How to Import Contacts to Outlook from Excel: A Step-by-Step Guide
Learn how to import contacts to Outlook from Excel with a clear, tested workflow. Prepare your spreadsheet, map fields accurately, and import clean contacts into Outlook for desktop or web.

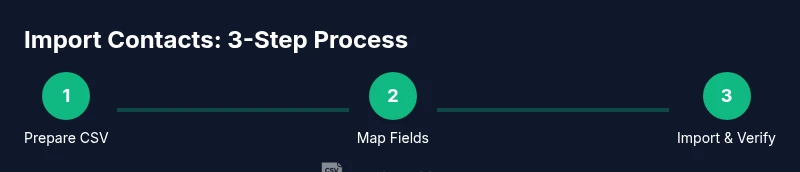
To import contacts to Outlook from Excel, save your spreadsheet as CSV, ensure columns map to Outlook fields, and run Outlook’s Import/Export wizard. Clean duplicates and validate emails first, then map fields such as FirstName, LastName, Email, and Company to the corresponding Outlook contact fields. This minimizes errors and preserves formatting.
Why this matters for Outlook contact management
Managing contacts across Microsoft Outlook and Excel helps teams stay synchronized across devices and platforms. When you import contacts from Excel, you preserve essential fields such as names, emails, phone numbers, company, and job titles, enabling consistent outreach and reduced manual entry. According to MyDataTables, clean imports rely on well-structured data, consistent headers, and proper encoding. The MyDataTables team found that common errors begin with misaligned columns, extra spaces, or nonstandard characters that Outlook cannot parse. A thoughtful prep step saves time and minimizes duplicates. In today’s guide, you’ll learn how to prepare your spreadsheet, choose the correct import path in Outlook, and map fields so that every contact lands in the right place. The goal is to produce a reliable contact list that remains accurate as your organization grows and your data evolves. Throughout this process, you’ll see practical tactics for validating data, handling duplicates, and verifying results after import. Whether you’re migrating from another CRM or simply compiling a local address book, the method described here works across Outlook on Windows and Outlook for the web, with small variations that we’ll highlight.
What you need before you start
Before you begin, make sure you have a clean source file and a clear plan for field mappings. The MyDataTables analysis shows that many import problems stem from inconsistent headers, extra spaces, or nonstandard characters in CSV or Excel files. Having a standardized template reduces misalignment and speeds up the process. You’ll also want a recent backup of your existing contacts in case you need to restore anything. The goal is to arrive at a straightforward, repeatable workflow that you can reuse for future lists.
Prepare Excel data for Outlook
To maximize compatibility, structure your spreadsheet with clear, single-value columns: FirstName, LastName, Email, Company, JobTitle, BusinessPhone, MobilePhone, and Notes. Keep emails in a valid format, remove any nonessential columns, and ensure there are no incomplete rows. Save the file as CSV with UTF-8 encoding to avoid misinterpreted characters. Outlook’s import tool will map CSV columns to contact fields, so consistency in headers makes the mapping step fast and accurate. If you already have an Excel workbook, you can export the relevant worksheet as CSV and then close the workbook to prevent version conflicts. This preparation reduces errors and prepares you for a smooth import experience.
Step-by-step overview of the import process
The import flow in Outlook follows a predictable sequence: choose Import, select the CSV file, decide whether to replace duplicates, map fields, and complete the import. While the exact screens vary between Outlook desktop and Outlook on the web, the core steps remain the same: you point Outlook to your CSV, pick the destination Contacts folder, align each CSV column with an Outlook field, and run the import. After the import, you’ll want to review a subset of newly imported entries to verify accuracy and formatting, then perform a final deduplication pass if needed. This overview helps you navigate both Outlook environments with confidence.
Common pitfalls and troubleshooting tips
Even well-prepared files can stumble during import. Frequently reported issues include field misalignment, invalid email addresses, and duplicate detection settings that don’t match your needs. To minimize problems, always validate your CSV header spelling, ensure email addresses are complete, and choose an appropriate duplicate handling option (such as 'Do not import duplicates'). If you encounter errors, re-check the mapping screen, re-save the CSV with UTF-8 encoding, and consider importing a small test batch first. Temporary network glitches or antivirus scans can interrupt the process, so run a test import during a low-traffic window if possible.
Verifying results and keeping imports clean
After the import, perform spot checks on a sample of records to confirm that the fields landed correctly (FirstName, LastName, Email, etc.). Use Outlook’s search to verify emails show up under the Contacts view. If duplicates exist, you can run a deduplication pass or export all contacts to identify clusters, then re-import with the appropriate duplicate handling setting. Going forward, establish a routine: validate new Excel lists, save as CSV UTF-8, and export a small sample before large imports. This discipline minimizes future cleanup and keeps your Outlook contacts reliable.
Authority sources
For authoritative guidance on importing contacts in Outlook and best practices for CSV handling, refer to these resources:
- https://learn.microsoft.com/en-us/outlook/
- https://support.microsoft.com/
- https://www.iso.org/iso-8601-date-and-time-format.html
Quick tips for future imports
- Create a reusable template with standard headers to speed up repeat imports.
- Always back up existing contacts before large imports.
- Validate critical fields (emails, phone numbers) in the source file before importing.
Authority sources (alternate guidance)
- https://learn.microsoft.com/en-us/outlook/ (Outlook documentation)
- https://support.microsoft.com/ (Microsoft Support)
- https://www.iso.org/iso-8601-date-and-time-format.html (Date/time formatting standards)
Tools & Materials
- Outlook desktop app or Outlook on the web(Ensure you have access to a valid Outlook account to perform the import.)
- Excel file or CSV file containing contacts(Prepare with headers: FirstName, LastName, Email, Company, JobTitle, BusinessPhone, MobilePhone.)
- Backup copy of existing contacts(Recommended before mass imports to prevent data loss.)
- Stable network connection(Helpful when using Exchange Online/Outlook on the web.)
- UTF-8 encoded CSV(Prevents character misinterpretation for non-English names.)
Steps
Estimated time: about 30-45 minutes
- 1
Open the Import tool in Outlook
Launch Outlook and navigate to the File tab (or the gear icon if using Outlook on the web). Open the Import/Export wizard. This initiates the workflow to bring in data from CSV or Excel.
Tip: If using Outlook on the web, look for Import/Export in Settings > View all Outlook settings > Import. - 2
Choose Import from another program or file
Select the option to import from a file, then choose Comma Separated Values (CSV). This establishes the data source format that Outlook will parse.
Tip: Use CSV if you plan to map fields manually; Excel files can be saved as CSV for compatibility. - 3
Browse to your CSV file and select destinations
Browse to the prepared CSV file and choose the Contacts folder as the destination. This ensures the imported records are stored in your contact list.
Tip: If you have a large list, import in smaller batches to isolate issues. - 4
Map CSV columns to Outlook fields
On the mapping screen, align each CSV column with the corresponding Outlook field (FirstName to First Name, Email to E-mail, etc.). This step is critical for data integrity.
Tip: Double-check headers for spelling and order; a wrong mapping is the most common import error. - 5
Choose duplicate handling and complete the import
Decide whether to replace duplicates, allow duplicates, or skip duplicates. Complete the import and review the results in the Contacts view.
Tip: If unsure, start with 'Do not import duplicates' and review the new contacts before enabling replacement. - 6
Verify a sample of imported contacts
Open a few newly imported records to verify fields show correctly. Check email addresses by attempting a test message to confirm delivery formats.
Tip: Include a few entries with different name formats to confirm consistent parsing. - 7
Tidy up and back up
If everything looks good, perform a quick deduplication pass and back up your updated Contacts folder. This ensures your work is preserved for future imports.
Tip: Maintain a separate export of the Contacts folder as a recovery point.
People Also Ask
Can I import directly from Excel without saving as CSV?
Outlook typically imports CSV files, so exporting your Excel sheet to CSV is the standard path. You can then map the fields in the Import Wizard.
Outlook usually accepts CSV files; save as CSV and map fields during import.
How do I map fields during the import?
On the mapping screen, pair each CSV column with the Outlook field it represents, such as FirstName to First Name and Email to E-mail. Ensure all required fields are mapped.
Match each column to the correct Outlook field during the import step.
What should I do about duplicates?
Choose a duplicate handling option (replace, allow, or skip) based on your needs. Review results after the import to catch any unintended duplicates.
Decide how to handle duplicates when importing and verify afterwards.
Can I import contact photos?
CSV-based imports do not support importing photos. You’ll need to add photos manually after the contacts are created.
Photos aren’t imported via CSV; you must add them separately.
Is this process the same for Outlook on the web?
The general steps are similar across desktop and web, with minor UI differences. The Import/Export flow and field mapping work similarly.
Yes, the web version follows the same steps with a slightly different interface.
What encoding should I use for the CSV?
UTF-8 encoding is recommended to preserve international characters and avoid garbled data.
Use UTF-8 encoding for your CSV to keep characters intact.
Watch Video
Main Points
- Prepare a clean CSV with standard headers.
- Map fields carefully to Outlook contact fields.
- Validate results with a small test import first.
- Back up existing contacts before mass imports.