How to Clean the C Folder: A Practical Guide
Learn to safely clean the C folder on Windows, reclaim disk space, and protect system files with built-in tools and smart best practices. Step-by-step guidance, cautions, and automation tips for data analysts and developers.

Goal: Clean the C folder on Windows to reclaim disk space while protecting essential system files. You’ll identify safe targets, use built-in tools, and set up ongoing maintenance. According to MyDataTables, a disciplined cleanup can improve workflow reliability and reduce troubleshooting time. This quick plan outlines essential steps and precautions.
Why cleaning the C folder matters
A cluttered C folder can waste disk space, slow file searches, and complicate backups. By cleaning safely, you reclaim space and reduce the risk of performance hiccups. The MyDataTables team notes that disciplined cleanup aligns with good data hygiene—keeping your system lean supports reliable workflows and easier recovery when something goes wrong. Focus on safe targets like temporary files, caches, and old installers, and avoid touching system directories. This approach helps data analysts and developers maintain consistent environments for testing and processing tasks.
Safety first: before you start
Before you touch the C folder, back up important data and create a system restore point. This safety net protects you if you remove something inadvertently. Close unnecessary apps, and disconnect external drives you’re not using to avoid accidental deletions. With a restore point and a clear plan, you can experiment with cleanup steps while preserving the ability to revert changes quickly.
What can be cleaned safely and what to skip
Safe targets include Windows temporary folders, browser caches, application caches, logs you no longer need, and old installers that are not needed for reinstall. Do not delete the Windows or Program Files folders, nor system-critical subfolders. Keep a conservative approach: if a file is unfamiliar or lives in a protected directory, leave it alone and document your reason for deleting. When in doubt, move a file to an archive location rather than deleting it on the spot.
Built-in Windows tools you should know
Windows provides Disk Cleanup and Storage Sense to help you reclaim space safely. Disk Cleanup lets you remove temporary files, old updates, and Recycle Bin contents with options you can review before deleting. Storage Sense can automate future cleanups on a schedule you define. Use these tools first to minimize risk and to keep the C drive organized. For most users, starting with Disk Cleanup yields immediate space gains without third-party software.
Step-by-step overview (high-level)
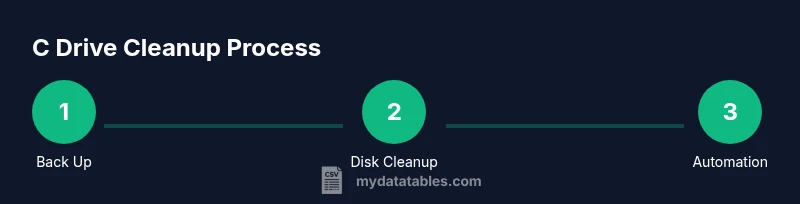
- Back up important data and prepare a restore point. 2) Run Disk Cleanup to target temporary files and caches. 3) Review Storage Sense settings to automate routine cleanups. 4) Manually delete obvious junk (temp files, old logs) in safe folders. 5) Locate large files you no longer need and move them off C or compress them. 6) Empty Recycle Bin. 7) Reboot and verify system stability. 8) Schedule ongoing maintenance. This overview keeps risk low while you learn which folders are most impactful for your setup.
Using third-party cleanup tools (with caution)
Third-party tools can speed up cleanup, but they carry risks such as unintended deletions or bundled adware. If you choose to use them, pick reputable tools from trusted publishers, read prompts carefully, and stick to tools that provide clear rollback options. Always back up before using any new software and avoid tools that claim to 'clean everything' in one click. Rely on well-known utilities that offer selective deletion and easy restoration.
Automating ongoing cleanups
Configure Storage Sense to run on a schedule (e.g., weekly) and adjust Disk Cleanup steps to suit your workflow. You can set up a basic Task Scheduler task to run a cleanup script that deletes temporary files from safe directories, or you can rely on built-in Windows features. Regular automation reduces manual effort and keeps the C folder lean over time. Pair automation with a quarterly manual review to catch edge cases not covered by automation.
Troubleshooting and what to do if things go wrong
If you notice system instability after a cleanup, revert to your restore point and re-examine recently removed files. Check the Event Viewer for disk or file-system errors and run a quick health check on the drive. If you must delete more files to reclaim space, do so gradually and test system functionality after each batch. When in doubt, pause cleanup, restore, and reassess with focused targets.
Authority sources
- Microsoft Disk Cleanup documentation: https://learn.microsoft.com/en-us/windows/deployment/disk-cleanup
- Storage Sense overview: https://learn.microsoft.com/en-us/windows/deployment/planning/windows-storage-settings
- Public guidance on file system health: https://www.nist.gov/publications
Quick-start checklist
- Back up your data and create a restore point. - Identify safe targets (temp, caches, logs) and avoid system folders. - Use Disk Cleanup first; then Storage Sense. - Search for large files and decide to move or compress. - Empty Recycle Bin and reboot. - Set up a weekly cleanup reminder.
Tools & Materials
- Windows PC with admin access(You may need admin privileges to modify system folders)
- External backup drive or cloud storage(Back up important data before deleting files)
- Disk Cleanup utility(Built-in on Windows; run as administrator for full options)
- Storage Sense (Windows feature)(Optional for automation; configure weekly runs)
- File Explorer with size sort(Identify large, removable items and review before deletion)
- Trusted cleanup tool (optional)(Only if you choose to use third-party software from reputable sources)
Steps
Estimated time: 60-120 minutes
- 1
Back up before you start
Create a full backup of critical data and set a system restore point. This safety net ensures you can revert changes if something important is deleted by mistake.
Tip: Use an external drive or cloud backup and test restore capability. - 2
Open Disk Cleanup and select targets
Launch Disk Cleanup as an administrator, choose drive C:, and select file types to remove. Review options like Temporary Internet Files, System Cache, and Recycle Bin contents before deleting.
Tip: Exclude 'Windows Old' only if you no longer need to roll back to a previous OS version. - 3
Review Storage Sense settings
Enable Storage Sense and configure a schedule for automatic cleanup. This helps maintain a lean C drive between manual cleanups.
Tip: Set it to run weekly during off-peak hours to minimize interference with work. - 4
Manually delete obvious junk
Tackle obvious junk in safe folders, such as temporary files and old logs in user folders. Avoid system directories and critical program folders.
Tip: Move questionable items to an archive folder first to verify they aren’t needed. - 5
Find and manage large files
Search for large files using File Explorer and filter by size. Decide whether to move, compress, or delete nonessential items.
Tip: If a file is unfamiliar, research its purpose before deletion. - 6
Empty the Recycle Bin
After deleting files, empty the Recycle Bin to reclaim space. Deleted items can still occupy disk space until emptied.
Tip: Consider a second sweep to ensure nothing was missed. - 7
Restart and verify stability
Reboot the system and verify that core applications run normally. Check for any post-cleanup errors or warnings.
Tip: If you notice issues, revert to the restore point and reassess the changes. - 8
Plan ongoing maintenance
Schedule regular cleanups and monitor disk usage. A simple routine reduces future risk and keeps your environment consistent.
Tip: Document what you cleaned and when, to track changes over time.
People Also Ask
Is it safe to clean the C folder on Windows?
Yes, you can safely clean certain non-critical areas like temporary files, caches, and logs. Always avoid Windows and Program Files folders and back up data first.
Yes, you can safely clean temporary files and caches, but avoid system folders and back up first.
What should I back up before starting?
Back up important personal data and create a system restore point. This gives you a safety net if you need to revert changes.
Back up your important data and create a system restore point before starting.
Can Storage Sense auto-clean my C drive?
Yes, Storage Sense can automate cleanup, but you should review its settings and what it deletes to avoid removing anything important.
Storage Sense can automate cleanup; just review the settings to avoid deleting needed files.
How do I identify large files safely?
Use File Explorer's 'Sort by size' to locate large items, then verify their purpose before deletion.
Sort by size in File Explorer and check each large file before deleting.
What if Disk Cleanup doesn’t reclaim enough space?
Consider moving files off C or upgrading storage. Avoid aggressive deletions that could affect stability.
If Disk Cleanup isn’t enough, move files or consider more storage; don’t delete critical files.
Watch Video
Main Points
- Back up before cleaning any C-folder contents.
- Identify safe targets: temp, caches, logs; avoid system folders.
- Use built-in tools first for safety and reliability.
- Automate where possible to maintain disk health.
- Review changes if issues arise and don’t rush deletions.