Export Jira to CSV: A Practical Step-by-Step Guide 2026
Learn how to export Jira to CSV with UI and API methods. This MyDataTables guide covers prerequisites, encoding, field selection, and data validation for clean, analysis-ready CSV exports.

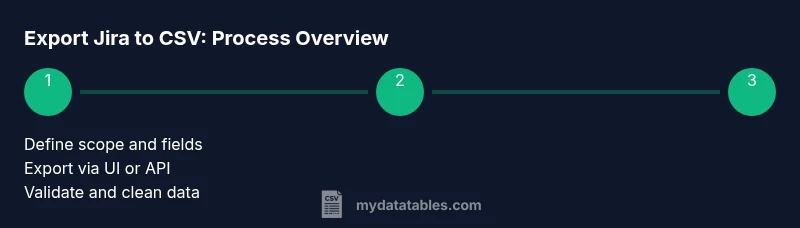
To export Jira to CSV, run an issue search, choose CSV export, and save the file with your preferred fields. Ensure you have the right permissions, select the needed fields, and pick UTF-8 encoding and comma delimiter. This steps-based guide covers UI export and API-based options, including filters for focused results.
Why exporting Jira to CSV matters for data teams
Data teams rely on Jira exports to integrate issue data with analytics pipelines, dashboards, and downstream reporting. A well-structured CSV makes it possible to aggregate metrics, perform trend analysis, and share findings with stakeholders who don't use Jira directly. The MyDataTables team finds that consistent export practices reduce cleaning time and decrease the risk of missed fields during handoffs. When teams standardize the output format, analysts can reuse the same columns across projects, enabling cross-project comparisons and reproducible analyses. This guide focuses on practical, actionable steps you can implement in minutes, whether you’re working with Jira Cloud or Jira Server, with attention to permission levels, encoding, and field visibility. Clear data export workflows also help with compliance and auditing, since the CSV reflects exactly what users chose to export. By starting with a defined scope and a simple validation pass, you’ll avoid common pitfalls like extra columns, missing values, or inconsistent delimiters that break downstream processes.
Prerequisites and planning
Before you export Jira data to CSV, confirm you have access and admin or project-level permissions needed to view and export issues. Decide which projects, issue types, and date ranges to include, and outline the target schema—i.e., which fields should appear in the CSV. Consider encoding (UTF-8 is standard for cross-language use) and delimiter (comma is common, but semicolon can help if your data contains commas). Map fields to your analytics needs: key fields like issue key, summary, status, assignee, priority, and created date are usually essential, while comments or attachments may be optional. If you’re using Jira Cloud, keep in mind UI export paths, and if you’re using Jira Server/DC, you might have different export options. The MyDataTables analysis indicates that planning the scope and validating field visibility upfront reduces the number of post-export clean-up tasks. Finally, decide whether you’ll export once or schedule recurring exports, as this affects your automation approach and file naming conventions.
UI-based export options in Jira
Most Jira instances offer a straightforward UI path to export: perform an issue search, open the export menu, and choose a CSV option. You’ll typically see choices like CSV (All fields) or CSV (Current fields). Select the option that aligns with your data needs, then save the file. When you export from Jira Cloud, you may encounter differences in available fields or the exact menu labels compared with Jira Server/DC, but the core idea is the same: define your scope, pick fields, and export. If you need consistency across teams, save a standard filter and reuse it for export, ensuring everyone pulls from the same dataset. The MyDataTables team notes that standardized exports reduce downstream cleaning and improve reproducibility across reports.
API-based export: Using Jira REST API to fetch issues and convert to CSV
For automation or large datasets, the REST API offers more control than the UI. Craft a JQL query to define the issue set, call the search endpoint, and paginate results as needed. You can request field names to appear, then convert the JSON payload to CSV in your preferred language or ETL tool. Use API tokens or OAuth credentials to authenticate, and respect Jira’s rate limits and pagination. This approach is ideal for scheduled exports, integrations with data warehouses, or custom reporting dashboards. Remember to maintain a consistent mapping between Jira field keys and your CSV columns, and validate the resulting file before loading into analytics pipelines.
Field mapping, filters, and encoding choices
Consistent field mapping is essential for reliable analyses. Decide whether to include standard fields (like issue key, summary, status, assignee, priority, and created date) and whether to add custom fields. Use filters to narrow down results by project, date ranges, or issue types to keep the CSV focused. Encoding choices matter: UTF-8 avoids mojibake with non-Latin characters, and DOM/byte order marks (BOM) can impact some downstream tools. If your CSV will be consumed by Excel or data processing pipelines, confirm the delimiter (comma is common) and prevent accidental regional misinterpretations by standardizing the locale settings. After export, verify that all expected columns are present and that dates and IDs have consistent formats across records.
Cleaning, validating, and preparing for analysis
Raw Jira exports often require light cleaning before analysis. Remove unused fields, standardize date formats, and normalize text (trimming whitespace, resolving duplicates). Validate row counts against your Jira search results, check for missing values in required columns, and ensure that issue keys align with the source projects. A quick validation pass saves hours of debugging later. If you’re maintaining a data catalog or data lake, keep a changelog of field additions or removals and use a consistent versioning scheme for export files. The MyDataTables insights emphasize validating output against the original query and performing a quick spot-check of rows to ensure data integrity across releases.
Automating exports for ongoing reporting
Automation is powerful for recurring reports. Schedule periodic exports (daily or weekly), generate uniquely named files (including date stamps), and route them to your data warehouse or analytics workspace. Use scriptable tools or Jira APIs to trigger exports, handle pagination, and enforce field mappings. Automations should include error handling and notifications if a export job fails. As you scale, consider modular pipelines that separate data extraction from transformation and validation steps. This approach keeps exports predictable and makes it easier to diagnose issues when reports don’t refresh as expected.
Tools & Materials
- Computer with internet access(Chrome/Edge/Firefox recommended; ensure you can access Jira and any external APIs.)
- Active Jira account with necessary permissions(Admin or project viewer permissions to export data.)
- Browser or API client(UI export within Jira or REST API tool for API-based export.)
- API token or OAuth credentials(Required if you plan to use API-based export.)
- CSV viewer or editor(Excel, Google Sheets, or a simple text editor for quick checks.)
- Optional: Scripting environment(PowerShell, Python, or Node.js for API-based automation.)
Steps
Estimated time: 60-90 minutes
- 1
Define data scope
Identify which projects, issue types, and fields you need in the CSV. Document required fields (e.g., key, summary, status) and any optional ones. Clarify whether attachments or comments should be included, and decide if you’ll export a single snapshot or multiple time-bound exports.
Tip: Start with a small pilot export to confirm field visibility and avoid overfetching. - 2
Run a Jira query
Create a JQL query that captures the exact set of issues you want. Save the filter for reuse and to ensure consistency across exports. Test the query by previewing results before exporting.
Tip: Use filters like project = X AND created >= -7d to focus on recent activity. - 3
Choose export format
In the UI, select CSV export. Decide between all fields vs. current fields based on your needs. If you’re automating, prepare the API call to fetch specific fields.
Tip: For analytics, CSV (All fields) often saves a follow-up mapping step. - 4
Set encoding and delimiter
Choose UTF-8 encoding to avoid character issues and verify the delimiter (comma) aligns with downstream tooling. If your data contains commas, consider quoting rules or a different delimiter.
Tip: Check a sample row to ensure quotes appear where needed. - 5
Export and save
Export the data and save to a defined path with a consistent naming convention (e.g., jira-export-YYYY-MM-DD.csv). Open the file to verify structure and basic integrity.
Tip: Keep backups of recent exports until validation is complete. - 6
Validate the CSV
Open the CSV in a viewer or processor and verify row counts, column headers, and data formats. Run a quick sanity check on dates, IDs, and status values.
Tip: If mismatches appear, revisit field mapping or re-run the export with adjusted filters. - 7
Automate if needed
If you plan recurring exports, implement a script or workflow to fetch data via API or schedule UI exports. Include error handling and notification steps.
Tip: Document the automation flow and monitor the first few runs closely.
People Also Ask
What permissions do I need to export Jira data to CSV?
You typically need access to view the issues and export privileges. In Jira Cloud or Server, this usually means having at least the ‘View’ permission on the project and the ability to export data. If you’re using the API, you’ll also need appropriate API credentials with scope for read access.
You typically need view and export permissions on the project, or API credentials with read access for automated exports.
Can I export attachments with a Jira CSV export?
CSV exports do not include binary attachments. If you need attachments, you’ll have to export metadata via CSV and handle attachments separately through Jira, a script, or a separate data pipeline.
Attachments aren’t included in CSV exports; you’ll need a separate process for them.
What is the difference between CSV (All fields) and CSV (Current fields)?
CSV (All fields) exports every available field for each issue, while CSV (Current fields) includes only the fields currently visible in your issue navigator. Choose based on whether you need a full schema or a focused subset for your analysis.
All fields gives you the full data model; current fields keeps export lean and focused.
How do I export from Jira Cloud vs Server differently?
The UI paths are similar but menu labels and available fields may differ between Jira Cloud and Server. For API-based exports, endpoints and authentication methods vary slightly. In both cases, ensure you have the correct permissions and filters before exporting.
Cloud and Server share the same principles, but the steps and endpoints differ slightly.
How can I schedule automatic Jira exports?
You can automate via Jira API calls in a script or use third-party tools to trigger exports on a schedule. Ensure error handling, logging, and proper credentials are in place.
Set up a script or tool to run exports on a schedule and monitor the results.
What should I do if the CSV has encoding issues?
If you see garbled text, verify UTF-8 encoding, avoid BOM conflicts, and ensure that downstream tools expect UTF-8. Re-export with the correct encoding settings and re-run your validation checks.
Check encoding, especially with non-Latin characters, and re-export if needed.
Watch Video
Main Points
- Define data scope before exporting.
- Choose UI or API based on needs.
- Validate CSV integrity post-export.
- Automate recurring exports to save time.