Convert CSV to Database: A Practical Step-by-Step Guide
Learn how to convert CSV to a database efficiently with practical methods, data mapping, and validation. This guide covers PostgreSQL, MySQL, and SQL Server workflows, plus tips for data quality and automation.

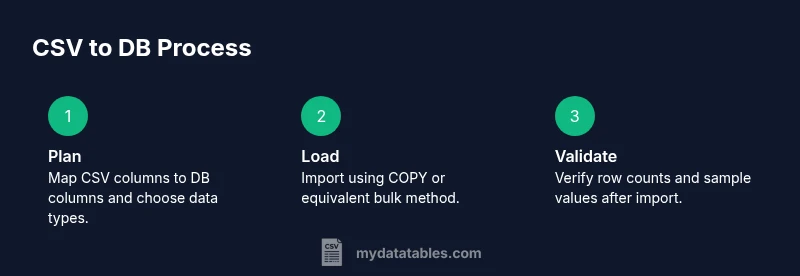
By the end of this guide, you will be able to convert a CSV file into a database table with confidence. You’ll learn how to map columns, choose an import method, handle data types and NULLs, and validate results. The steps cover PostgreSQL, MySQL, and SQL Server workflows, plus testing strategies.
Why Convert CSV to Database Matters
CSV files are a common starting point for data collection because they are portable, readable, and easy to generate. However, they don’t support robust querying, data integrity constraints, or scalable reporting. Converting CSV to a database creates a structured, queryable data store that enables fast analytics, joins with other datasets, and consistent enforcement of data types and rules. When you convert csv to database, you gain a foundation for reliable dashboards, automated ETL pipelines, and reproducible analysis across environments. The MyDataTables team highlights planning and validation as essential to success, especially when scaling from ad-hoc CSVs to production-grade data stores. With clear data models, you reduce rework and improve data quality for downstream users and applications.
Planning Your CSV to DB Import
Effective imports begin with planning. Decide which database you’ll use (PostgreSQL, MySQL, SQL Server, or SQLite) and design a target schema that mirrors the CSV structure while enforcing sensible data types and constraints. Create a mapping document that links each CSV column to a database column, including type, length, allowable values, and whether NULLs are permitted. Consider deduplication rules, handling of missing values, and whether you need surrogate keys. If your CSV files vary across batches, plan for validation checks to catch schema drift. A well-documented plan, endorsed by MyDataTables, reduces ambiguity and accelerates troubleshooting when issues arise.
Choosing a Database and Import Method
Your choice of database and import method depends on data size, performance needs, and your tooling preference. For analytic workloads, PostgreSQL and MySQL are common choices; SQL Server is also viable in Windows environments. Import methods range from bulk options (COPY in PostgreSQL, LOAD DATA INFILE in MySQL) to row-by-row inserts through scripting. Bulk imports are typically fastest but require correct data types and clean input. If you’re integrating CSVs with existing pipelines, ETL tools or Python-based scripts offer reusability and error handling. MyDataTables observes that matching your method to your data volume is critical for predictable performance and reliability.
Data Preparation and Cleaning
Clean data before import to reduce errors and improve integrity. Verify encoding (UTF-8 is standard), confirm delimiter and quote handling, and ensure the header row aligns with your target schema. Normalize date formats, strip extraneous whitespace, and convert numeric fields to the correct types. Detect and address inconsistent units or units of measure. Create a small test CSV with representative rows to validate your mapping and casting rules. Proper preparation saves time during the actual load and minimizes the need for post-import fixes.
Import Techniques: SQL, ETL, and Scripting
There are multiple pathways to import CSV data. Direct SQL approaches (such as COPY in PostgreSQL or BULK INSERT in SQL Server) offer speed for large files and simple pipelines. ETL tools provide robust scheduling, transformation capabilities, and error handling, which is helpful in complex environments. Scripting languages like Python or Node.js enable incremental loads, custom validation, and easy reuse across projects. When choosing an approach, balance speed, maintainability, and the ability to recover from partial failures. A practical workflow often combines a fast bulk load with subsequent validation and incremental updates for new data.
Validation and Error Handling
Validation is not a afterthought—it’s the backbone of a trustworthy migration. After loading, compare row counts between CSV and database, verify a sample of row values, and check for NULLs and out-of-range data. Use constraints and checks on the target table to catch violations. Maintain a log of rejected rows with reasons and prepare a retry plan. If possible, run a secondary verification by exporting the loaded data back to CSV and performing a round-trip comparison. This discipline ensures you catch data quality issues before they affect analysts and dashboards.
Performance Tips for Large CSV Files
Large CSVs demand careful performance planning. Load in batches, tuning batch size to minimize lock contention while maximizing throughput. Disable nonessential indexes during the initial load, then rebuild them after the data is in place. Use parallelism where supported (e.g., parallel COPY in PostgreSQL or partitioned loads). If your CSV contains many small files, merge them into larger chunks to reduce overhead. Finally, monitor disk I/O and memory usage, and adjust the database server configuration for bulk operations to avoid timeouts or resource exhaustion.
Example Walkthrough: From CSV to PostgreSQL
This example walks through a typical PostgreSQL scenario. Step 1: design a target table with appropriate data types and constraints (text for names, integers for IDs, timestamps for dates). Step 2: use COPY to import the CSV, ensuring UTF-8 encoding and correct delimiter. Step 3: run validation queries to compare row counts and sample values. Step 4: create indexes on frequently queried columns for performance. Step 5: document the mapping and validation checks so the process is repeatable for future CSV batches. While the commands vary by environment, the core principles—clear mapping, clean input, and thorough validation—remain universal.
Common Pitfalls and How to Avoid Them
Anticipate common mistakes such as mismatched data types, incorrect delimiters, and forgotten headers. These issues derail imports and require time-consuming fixes. Avoid them by validating the CSV schema against the target table before loading, using explicit casting for critical fields, and enabling strict mode in the database during import. Always back up your data before large migrations and keep a changelog of schema decisions. Practicing these habits reduces risk and makes future imports faster.
Next Steps: Automate and Monitor Your Imports
Once you’ve established a reliable CSV-to-database workflow, automate it. Schedule incremental loads, implement retry logic, and set up monitoring with alerts for failures or data anomalies. Consider versioning the target schema and keeping a changelog of import configurations. Automation minimizes manual intervention, while continuous monitoring catches issues early. Over time, you’ll create a resilient, auditable process that scales as data volumes grow.
Tools & Materials
- CSV file(s)(Source data with headers; ensure consistent separators)
- Database server(PostgreSQL, MySQL, SQL Server, or SQLite)
- Database user with import privileges(Read/write and create schema as needed)
- SQL client or database GUI(psql, mysql client, SSMS, or DBeaver)
- Data cleaning script or ETL tool(Optional but recommended for large datasets)
- Mapping document or schema diagram(Map CSV columns to DB columns including types)
- Backup/restore plan(Always back up before import)
- Sample data subset for testing(Small subset to verify import)
Steps
Estimated time: Total time: 2-4 hours (depends on dataset size and environment)
- 1
Define target schema and mapping
Create a table in the target database with data types that reflect the CSV columns. Prepare a mapping document that links each CSV column to a database column, including casting rules and nullability. This step reduces guesswork during import and helps enforce data integrity.
Tip: Lock in data types early; mismatches cause runtime errors during load. - 2
Prepare CSV and environment
Validate encoding (prefer UTF-8), confirm delimiter, and ensure the header row matches your mapping. Clean any obvious anomalies in a staging copy and test with a small subset to catch format issues before full import.
Tip: Test with 1–2 rows to confirm parsing behavior before full run. - 3
Create target table
Execute a CREATE TABLE statement that mirrors your mapping document, including NOT NULL constraints for required fields. Add indexes for commonly queried columns after the initial load to optimize performance.
Tip: Use explicit constraints to prevent bad data from entering the table. - 4
Choose import method
Select a bulk loading method (e.g., COPY for PostgreSQL, LOAD DATA INFILE for MySQL) for speed, or a scripted approach for complex transformations. Consider ETL tools if multiple files require consistent transformations.
Tip: Bulk loads are fastest; reserve transformations for post-load steps when possible. - 5
Perform the load
Run the import using the chosen method, ensuring correct encoding and delimiter handling. If loading in batches, monitor progress and log any errors for later remediation.
Tip: Prefer batch loads with commit control to reduce lock contention. - 6
Validate results
Query row counts, sample values, and key aggregates to verify the import. Compare a CSV export of the loaded data to the source to confirm round-tripping fidelity.
Tip: Automate a basic checksum on critical columns. - 7
Handle errors and exceptions
Identify rejected rows, fix the underlying issues, and re-run the import selectively. Maintain an error log and implement retry logic for transient failures.
Tip: Isolate problematic rows to avoid reloading the entire dataset. - 8
Index and optimize post-load
Create or rebuild indexes after load to speed up queries. Consider partitioning large tables if you expect ongoing big imports or analytics workloads.
Tip: Index only the most used columns to avoid slowing writes. - 9
Document the pipeline
Capture the mapping, validation checks, and import configuration in a living document. Include versioning to track changes over time.
Tip: Documentation makes future imports faster and less error-prone. - 10
Automate incremental imports
Set up scheduling and incremental loading to bring in new rows regularly. Add monitoring and alerting to catch failures early and maintain data freshness.
Tip: Plan for idempotent loads where possible to avoid duplicates.
People Also Ask
What is the best method to import CSV into PostgreSQL?
COPY is the most efficient method for large CSV imports in PostgreSQL when the input file is accessible by the server. Ensure the CSV is properly encoded, the delimiter matches, and the target table schema is aligned with the CSV columns. Use transactions to wrap the load for safety.
COPY is the fastest method for large CSV imports in PostgreSQL when the file is accessible on the server, with proper encoding and a matching schema.
How do I handle data types during CSV import?
Map each CSV column to an appropriate database type before loading. Use explicit casts if the importer treats numeric values as text. Validate date and timestamp formats and convert them to the database’s standard representations.
Map columns to proper types and cast as needed to ensure dates and numbers are stored correctly.
What should I do if some rows fail to import?
Enable detailed logging of failed rows with reasons, fix the root issue, and retry only the failed subset. Keep a separate log for auditing and repeatable re-runs to avoid data duplication.
Log failing rows, fix the issues, and retry just the problematic subset to keep data clean.
How can I automate repeated CSV imports?
Wrap the import process in a script or ETL workflow, schedule it, and include monitoring with alerts for failures. Ensure idempotence where possible to prevent duplicates on repeated runs.
Automate with scripts or ETL tools, schedule regular imports, and monitor for issues.
Should I import directly into production data stores?
Prefer a staging environment for validation before moving data to production. Use a controlled promotion process and maintain a rollback plan in case issues arise after the import.
Use a staging area for validation and have a rollback plan before updating production data.
Watch Video
Main Points
- Plan the data model before importing any data.
- Validate input and perform a small pilot load first.
- Choose the right import method based on dataset size.
- Validate results and log errors for future reliability.
- Automate and monitor ongoing CSV-to-database pipelines.