Mastering CSV Upload: A Practical How-To for Analysts
Master CSV upload: learn to prepare, validate, and import CSV data across platforms with encoding, delimiters, and mapping best practices from MyDataTables.

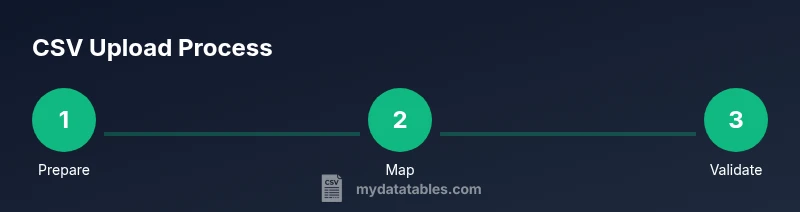
With CSV upload, you will import tabular data from a CSV file into your chosen platform, validating headers, encodings, and mappings before import. This quick guide shows the essential steps, common pitfalls, and best practices for reliable data ingestion across systems. You’ll learn how to prepare, upload, and verify CSV data efficiently.
Understanding CSV upload in modern data workflows
CSV upload is a foundational capability for data analysts, developers, and business users. It enables you to move structured data from flat files into databases, analytics platforms, or reporting tools. When you think about csv upload, consider three core ideas: portability (CSV is broadly supported), predictability (columns map to types and schemas), and governance (you track changes and prove provenance). In practice, a reliable csv upload process reduces manual data wrangling and accelerates insights. The MyDataTables team emphasizes starting with a clear definition of the target schema and the expected data quality. As you begin, ensure you understand where the data will land and what rules govern it. This mindset helps you design robust import pipelines that scale across teams and projects.
How to implement this block content: Start with a clean mental model of where your data goes, what fields matter, and which validations are non-negotiable. Think about headers as contract signatures between your file and the target system, and map each header to a field in your destination. A solid csv upload plan reduces errors downstream and improves reproducibility across analyses.
In addition, incorporate a lightweight data quality checklist. At minimum, confirm the header row exists, there are no duplicate column names, and string fields are trimmed of extraneous whitespace. For teams using MyDataTables, define a standard set of required columns and enforce them during the upload to ensure consistent results across dashboards.
Tools & Materials
- Source CSV file(Ensure the file is accessible and uses a consistent delimiter.)
- Target platform or destination (database, warehouse, CMS)(Know the destination schema and permission level.)
- User account with upload permissions(Verify role has import rights.)
- Character encoding (UTF-8 recommended)(Check for BOM and non-ASCII characters.)
- Delimiter and quoting rules(Typically comma-delimited; know if semicolons are used.)
- Field mapping template or schema(Prepare a mapping between CSV headers and destination fields.)
- Test CSV file (small sample)(Run a dry run to catch mapping issues.)
- Validation script or data quality rules(Optional but helpful for automated checks.)
Steps
Estimated time: 15-25 minutes
- 1
Prepare your CSV file
Ensure the file uses UTF-8 encoding, includes a header row, and uses a consistent delimiter (usually a comma). Validate that values align with your destination schema and remove any stray characters that could break parsing.
Tip: Keep a sample header row that mirrors the target schema for quick reference. - 2
Validate headers and data types
Check that all required fields exist and that data types match what the destination expects (e.g., integers for IDs, dates in valid formats). Use a small subset to test mappings before full import.
Tip: If you have optional fields, decide whether to map them now or leave them null. - 3
Access the upload interface
Log into the target platform and locate the data import or CSV upload feature. Confirm you’re in the correct environment (production vs. staging) and have the necessary permissions.
Tip: Enable or request a test environment if available to minimize risk. - 4
Upload the CSV file
Choose the file, review the upload settings (delimiter, encoding, header presence), and start the import. Some platforms auto-detect encoding; if not, explicitly select UTF-8.
Tip: Do not include overly large files in the first run; start with a smaller batch. - 5
Configure field mappings
Map each CSV column to the corresponding destination field. Verify any required fields, rename headers if needed, and ensure temporal fields use consistent formats.
Tip: Use a saved mapping template to speed up future uploads. - 6
Run a test import
Import a small subset to verify results and catch errors early. Review error messages, fix source data, and re-upload the test batch.
Tip: Document any recurring errors to guide future imports. - 7
Finalize and validate
Run the full import with confidence after successful tests. Validate that records appear correctly, check aggregations, and monitor for anomalies.
Tip: Set up an automated post-import validation if possible.
People Also Ask
What is CSV upload and where is it used?
CSV upload is the process of importing data from a CSV file into a target system, such as a database or analytics platform. It relies on correct headers, encoding, and field mappings to ensure data lands in the right place.
CSV upload is importing a CSV file into a system, making sure headers and mappings line up so data ends up where it should.
Why do uploads fail, and how can I prevent it?
Common failures come from encoding mismatches, incorrect delimiters, missing headers, or mismatched field types. Prevent by validating the CSV against the destination schema before import and testing with a small batch.
Uploads fail mainly due to encoding, delimiters, and header mismatches. Validate first and test with a small sample.
How should I validate a CSV before uploading?
Check encoding (UTF-8), confirm headers, verify required fields exist, and ensure data types align with the destination schema. Run a lightweight test import to catch issues early.
Validate encoding, headers, and data types; run a test import to catch issues early.
What about large CSV files?
For big imports, use chunking or streaming if the platform supports it. Consider breaking the file into smaller batches and validating each before aggregation.
If the file is large, import in chunks and validate each batch to avoid timeouts and errors.
Can I automate CSV uploads?
Yes. Use scripts or ETL tools to schedule exports, then map fields and run post-import checks automatically. Maintain versioned templates for repeatability.
Yes, automation with scripts or ETL tools can schedule and validate uploads.
How do I map CSV columns to a database schema?
Create a mapping template that links each CSV header to a destination field, specifying data types and any transformation rules. Save and reuse the template for consistency.
Create a header-to-field mapping template and reuse it.
Watch Video
Main Points
- Prepare with a clear target schema and mapping.
- Validate headers, encoding, and data types before import.
- Test with small batches to catch errors early.
- Use templates to speed repeated CSV uploads.