CSV Import: A Practical Step-by-Step Guide for 2026
Master CSV import workflows across spreadsheets, databases, and BI tools with practical steps, header mapping, delimiter handling, and validation tips from MyDataTables.

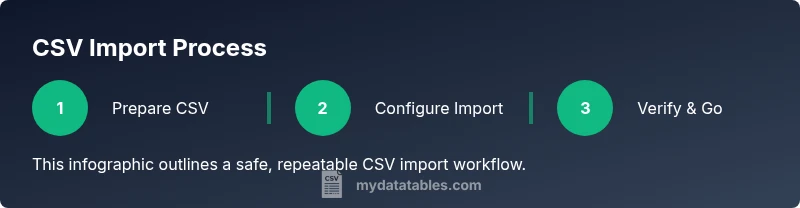
Learn how to import a CSV file into your target app with a reliable workflow: map headers, choose the correct delimiter, and validate results. Gather your CSV file, the destination app, and any needed credentials, then follow the step-by-step instructions to avoid common import errors.
What csv import is and why it matters
CSV import refers to loading comma-separated values from a plain text file into another application, system, or data pipeline. This operation underpins how teams move data between spreadsheets, databases, and BI tools, supporting reporting, analytics, and automation. According to MyDataTables, getting CSV imports right reduces downstream data errors and saves analysts hours of cleanup. When done well, a single import can establish a reliable data feed for dashboards and models, enabling faster decision-making. The key is to treat the CSV as a data contract: headers define fields, rows carry records, and encodings determine readability across platforms. This section lays the foundation for why a robust CSV import process matters for data quality, governance, and operational efficiency. Readers will learn common patterns, pitfalls, and the practical steps used by professionals to validate imports before they flow into analytics workflows.
Pre-import preparation: data cleanliness and standards
Before any import, ensure the source data is clean and well-structured. Remove duplicates, fix inconsistent spellings, and standardize date formats. Validate that the header row exists and that column names are consistent with the destination schema. Choose a consistent encoding, preferably UTF-8, to minimize misread characters across systems. Ensure there are no stray invisible characters and that numeric fields are stored in their proper formats. Establish a lightweight data dictionary that describes each column's purpose, type, and acceptable values. By investing a little time up front, you reduce post-import validation time and improve data governance across teams.
Handling delimiters, encodings, and headers
CSV files can use various delimiters—most commonly a comma, but semicolons or tabs appear in different locales. Always confirm the delimiter used in your file and set the importer accordingly to avoid misaligned columns. Encoding matters too: UTF-8 is the most portable choice, but some sources use UTF-16 or ISO-8859-1. If your file uses headers with spaces or special characters, decide whether to preserve them or map to sanitized field names in the destination. When headers are misaligned, the importer can misfill fields, leading to errors that are difficult to diagnose later. A small change at this stage prevents many downstream headaches.
Import workflows by destination: spreadsheets, databases, and BI tools
Spreadsheets like Excel or Google Sheets typically offer guided import wizards where you specify delimiter, encoding, and header handling. Databases (e.g., PostgreSQL, MySQL) provide bulk load utilities or ORM integrations that map CSV columns to table fields. BI tools (such as Power BI or Tableau) accept CSVs for data sources and often require data type inference and schema mapping. In each case, verify the first few rows after import to ensure that data types are correct and that there are no truncations. Document the exact steps you followed so teammates can reproduce the process and audit data lineage. MyDataTables analysis shows that delimiter and encoding issues account for a large share of initial import failures, making these settings critical.
Validation, error handling, and best practices
After import, validate row counts against the source, spot-check sample records, and verify key aggregates. Use data validation rules to confirm column types and value ranges. If you encounter errors, inspect the import log for lines, columns, and error messages, then correct the source or the mapping and re-import. Consider staging imports on test datasets before applying them to live data, especially for large files. Finally, establish a repeatable process: versioned CSV samples, documented mapping schemas, and automated checks that run whenever a new file is imported. This practice reduces risk and improves trust in data pipelines.
Tools & Materials
- CSV file(UTF-8 encoding preferred; headers must be present)
- Destination application (e.g., Excel, Google Sheets, SQL DB, or BI tool)(Know where you want to import)
- Delimiter and encoding reference(Default delimiter is comma; be ready to adjust for semicolon or tab; ensure encoding is UTF-8 when possible)
- Text editor or viewer(Optional for quick inspection of the raw file)
- Sample data or schema outline(Helpful for mapping fields during import)
Steps
Estimated time: 30-90 minutes
- 1
Prepare your CSV file
Open the CSV and verify that headers exist and data looks consistent. Check for unusual quotes or line breaks that could break the import.
Tip: Run a quick check with a text editor to confirm delimiter consistency. - 2
Choose your import destination
Decide where you will import (Excel, Google Sheets, a database, or a BI tool) and locate the import feature.
Tip: If you plan to automate the import, note the API or connector you will use. - 3
Open the import tool
Launch the importer in your destination app and select the CSV file to begin the wizard.
Tip: Prefer a tool that shows a live preview of the data rows. - 4
Configure delimiter and encoding
Set the correct delimiter and encoding (UTF-8 recommended) so columns align and characters render correctly.
Tip: If unsure, test with a small subset first. - 5
Map headers to fields
Match each CSV header to the corresponding field in the destination schema.
Tip: Preserve important header names for clarity and future maintenance. - 6
Validate a sample load
Import a small sample to verify that data types and formatting are correct.
Tip: Check date formats, numeric precision, and null handling. - 7
Run the full import
Execute the complete import and monitor for errors or warnings.
Tip: If possible, run as a transaction to allow rollback. - 8
Verify results and document
Confirm total row counts and spot-check critical fields; document the mapping and any fixes.
Tip: Capture a screenshot of the final mapping for audits.
People Also Ask
What is CSV import?
CSV import loads comma-separated values from a text file into another app, preserving rows and columns for analysis.
CSV import loads values from a comma-delimited text file into another app, preserving structure for analysis.
Which delimiter should I use?
Default CSV uses a comma, but semicolons or tabs are common in some locales; ensure the importer matches the file's delimiter.
Most CSVs use a comma, but check your file and set the importer accordingly.
How do I map headers to fields?
Map each CSV header to the corresponding destination field; keep names clear to avoid confusion in downstream analytics.
Map each header to the correct field to keep data organized.
What checks should I run after import?
Verify row counts, sample values, and data types; run simple queries to confirm integrity.
Check row counts and sample values to ensure data integrity.
Can I import large CSV files safely?
Yes, but use chunking or batching, streaming, and transactions to avoid timeouts and errors.
Yes, import large CSVs by chunking and using transactions to avoid errors.
Watch Video
Main Points
- Validate headers and encoding first
- Choose the correct delimiter before import
- Map fields carefully to prevent misalignment
- Test with a small subset before full import
- Document the workflow for reproducibility