Google Map CSV Import: Step-by-Step Guide
Learn how to import CSV data into Google Maps via Google My Maps. Format your CSV, map fields, and verify results with best practices from MyDataTables.

Master the google map csv import workflow by importing a CSV into Google Maps through Google My Maps. You’ll format the file, map columns to map fields, and verify results before sharing. This step-by-step guide covers common pitfalls and best practices, with MyDataTables insights to improve reliability.
Understanding Google Map CSV Import
Importing a CSV into Google Maps typically means bringing a list of addresses or coordinates into Google My Maps so you can visualize them on a custom map. This workflow separates data preparation from the map interface, reducing manual pin placement and making updates easier over time. According to MyDataTables, CSV-ready data that uses clear headers and consistent formatting tends to produce cleaner imports and fewer geocoding errors. In practice, you’ll learn how to format a CSV, choose the right fields, and map them to the correct map attributes, ensuring your locations appear where you expect. The result is a reproducible, scalable process you can repeat for multiple datasets.
Beyond My Maps, consider how teams share maps: view-only links versus collaborative editing. A well-structured CSV makes it easier to hand off data between analysts and developers, aligning with data governance practices that MyDataTables advocates for CSV-guided workflows.
CSV format and column mapping for Google Maps
Google My Maps prompts you to map your CSV columns to map fields during import. For reliable results, include a header row with descriptive names such as Name (or Label), Address, City, State/Province, Country, and optionally Latitude and Longitude. If you provide Lat/Lng values, you can place pins precisely even when an address is ambiguous. Keep the fields consistent across rows, and avoid special characters in headers that could confuse the importer. If column names differ from expected labels, you can still map them manually during the import step. Consistency in formatting (addresses, abbreviations, and country codes) improves geocoding outcomes and reduces misplacement.
Preparing your CSV for import
Start with UTF-8 encoding and a comma-delimited CSV. Ensure the first row contains headers and every data row has values for the required columns. Clean up stray quotes, remove duplicates, and standardize address components (e.g., street, city, state) to improve matching. If you work with international addresses, include a country column to disambiguate. For ongoing projects, maintain a change log and versioning so you know which rows have changed since the last import. Keeping a tidy source CSV not only speeds up imports but also reduces downstream discrepancies in your maps, reports, and dashboards.
If your data contains sensitive locations, consider anonymizing or redacting exact coordinates before sharing publicly, in line with privacy policies and organizational guidelines.
Step-by-step workflow overview
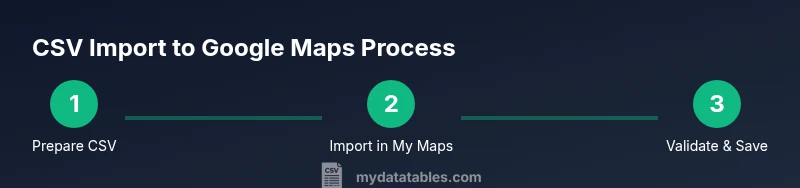
Think of the workflow as a repeatable cycle: plan, prepare, import, validate, and refresh. 1) Plan the data schema and determine which fields will appear as the map label, 2) Prepare and validate the CSV so headers and data cells are consistent, 3) Open Google My Maps and create a new map, 4) Use Import to add the CSV, 5) Map CSV columns to the map fields, 6) Review the geocoded results and adjust as needed, 7) Save and name the map, 8) Share or export the map or its data, 9) Maintain the CSV and map with regular updates.
This cycle helps teams maintain data integrity and supports incremental updates as datasets grow or change.
Importing the CSV into Google My Maps: a practical walkthrough
Sign in to your Google account and navigate to Google My Maps. Create a new map, then click Import. Upload your CSV file and allow Google to geocode addresses. During the mapping step, specify which columns correspond to Title (Name), Address, City, State, and other fields. If you supplied Latitude and Longitude columns, select them as the location fields to pin points exactly where you want. After import, inspect pins for accuracy, adjust any mislocated points, and save the map with a clear, descriptive name. Sharing options let you control who can view or edit the map.
Validating results and fixing common issues
After import, verify a representative sample of pins by clicking them to confirm correct addresses. If some rows fail geocoding, try combining address components into a single line (e.g., Street, City, State, Country) or add a country field to disambiguate. Duplicates can occur when the same location is listed multiple times; remove or merge duplicates by cross-checking coordinates or identifiers. For large datasets, import in chunks to isolate problematic records, then fix those rows in the source CSV and re-import the affected subset. Regular validation keeps maps reliable over time.
Advanced techniques: using Lat/Lng for precise placement
Lat/Lng coordinates offer precise control over pin placement, bypassing geocoding ambiguities. If your CSV includes latitude and longitude columns, select these as the location fields during import. This approach avoids misinterpretation of ambiguous or regional address formats. When sharing publicly, consider obfuscating exact coordinates for privacy, while keeping the essential location context intact for your audience. Advanced users can also derive Lat/Lng from known geocoding services and append it to the CSV for deterministic results.
Sharing, exporting, and updating your map data
Maps created from CSV imports can be shared with specific people or kept private, depending on your preferences. If the source CSV is updated, you can re-import updated rows or refresh the map data by re-uploading the file, ensuring your map stays current. Google My Maps supports data export, but for richer data manipulation, you can link the map to a Google Sheet and pull updates automatically whenever the sheet changes. Maintaining a data lineage between the CSV and the map supports audit trails and reproducibility for teams.
Best practices for ongoing CSV imports to maps
Treat the CSV as a living document: document column mappings, enforce a versioning scheme, and validate new rows before import. Use a consistent delimiter (comma) and UTF-8 encoding to ensure compatibility across systems. Set clear ownership for CSV updates and implement a simple review workflow to catch inconsistencies early. By following these practices, your google map csv import workflow remains reliable, scalable, and easier to hand off to teammates.
Tools & Materials
- CSV file prepared for Google Maps (UTF-8, comma-delimited)(Headers: Name, Address, City, State, Country; optional Lat/Lng)
- Web browser with Google account access(Chrome recommended for best compatibility)
- Google My Maps access(Navigate to Google My Maps and create a new map)
- Text editor or spreadsheet app(Use for editing headers or validating data format)
- Sample template CSV(Helpful for ensuring consistent headers across projects)
Steps
Estimated time: 30-60 minutes
- 1
Prepare your CSV
Create a UTF-8 encoded CSV with headers and consistent data. Include at least a label and a location field; add Lat/Lng if you have them. Validate data types and remove duplicates.
Tip: Use a consistent header naming convention and avoid special characters in headers. - 2
Create a new Google My Maps project
Open Google My Maps and start a new map. Give the map a descriptive name that reflects its purpose and audience.
Tip: Enable editing permissions only for trusted collaborators to protect data quality. - 3
Import the CSV
Click Import in the map editor and select your CSV file. Allow Google to read the file, then proceed to map columns to map fields.
Tip: If a column is misinterpreted, remap it during the import step rather than after saving. - 4
Map CSV columns
Assign each CSV column to a map field (Name/Label, Address, City, State, Country, Lat, Lng). Ensure the location columns are correctly chosen to place pins.
Tip: Prioritize Lat/Lng if your data includes precise coordinates to improve accuracy. - 5
Review geocoding results
Scan a sample of pins to verify accuracy. Manually adjust any pins that geocoding mislocated or failed.
Tip: Use the search function in the map editor to locate and verify tricky addresses. - 6
Save and name your map
Save the map with a clear, descriptive title and a concise description outlining the data source and update cadence.
Tip: Document data provenance so future users understand origin and edits. - 7
Share or export the map
Choose sharing settings: public, or restricted to specific people. Consider exporting to a CSV or linking to a Google Sheet for live updates.
Tip: Be mindful of privacy when sharing location data publicly. - 8
Validate updates
If you refresh data from the source CSV regularly, re-import or re-sync changes to keep the map current.
Tip: Keep a changelog and versioned CSV files for traceability. - 9
Handle large CSV files
For very large datasets, split the CSV into smaller chunks and import incrementally to simplify error tracing.
Tip: Monitor browser performance; consider using Lat/Lng fields for precision instead of large address lists. - 10
Maintain data quality
Establish a routine for checking invalid or outdated addresses and updating coordinates as needed.
Tip: Set up a quarterly review to refresh data with current addresses and changes. - 11
Document the workflow
Create a short playbook describing column mappings, update procedures, and sharing rules for future users.
Tip: A documented process reduces errors and speeds handoffs between teams. - 12
Archive old data
Archive outdated CSVs and maps with clear version numbers, avoiding confusion in ongoing projects.
Tip: Retain only necessary historical rows to keep maps lean and fast.
People Also Ask
Can I import directly into Google Maps without using My Maps?
No. Google Maps does not provide a direct bulk CSV import flow. Use Google My Maps to import and visualize your data, then optionally link or publish the results in Google Maps.
You can't import a CSV directly into Google Maps; use Google My Maps to bring in the data first.
What header fields are required for a CSV import?
At minimum, include a label (Name) and a location field (Address or Lat/Lng). Additional fields like City, State, and Country help improve geocoding accuracy.
A header with a label and a location field is essential; extra fields help clarity.
What formats are supported for import?
Google My Maps supports CSV imports. Ensure the file is UTF-8 encoded and comma-delimited for best compatibility.
CSV is supported; make sure the file is UTF-8 encoded.
How large can a CSV be for import?
There is no fixed official limit, but very large files can slow geocoding and the map editor. Consider splitting large datasets into smaller chunks.
Very large CSVs may slow things down; split large files into smaller batches.
Can I update map data after import?
Yes. Update the source CSV and re-import affected rows, or refresh the data by editing pins directly in My Maps and saving changes.
You can update the CSV and re-import or edit pins in My Maps.
Are there privacy considerations when sharing maps?
Yes. Review sharing settings and redact sensitive locations if needed before making a map public.
Be mindful of what you share; redact sensitive locations if necessary.
Watch Video
Main Points
- Prepare a clean, UTF-8 CSV with clear headers
- Map CSV columns carefully during import
- Use Lat/Lng for precision when available
- Validate a sample of pins and fix errors promptly
- Maintain data quality with versioned CSVs and documentation