How to Import Contacts CSV into Outlook
Learn how to import a CSV file of contacts into Outlook on desktop and web. This comprehensive guide covers data prep, field mapping, and troubleshooting to ensure accurate import and clean duplicates.

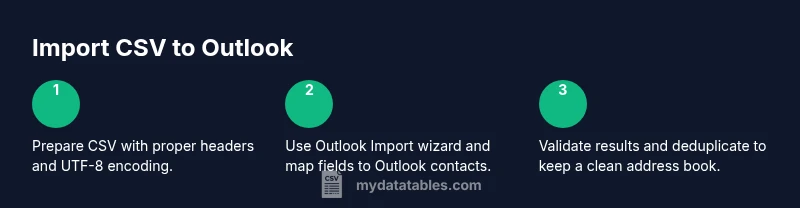
You can import contacts from a CSV file into Outlook by preparing a clean CSV with Outlook-friendly headers, then using the Import feature in either Outlook Desktop or Outlook on the Web. Map each CSV column to the corresponding Outlook field, review the import mappings, and run the import. Afterward, verify the results and remove any duplicates to keep your address book tidy.
Why Import Contacts CSV into Outlook
Importing contacts from a CSV into Outlook is a common data-management task for data analysts, developers, and business users who rely on a consistent address book across devices and apps. The exact steps differ slightly between Outlook Desktop and Outlook on the Web, but the core concept remains the same: a CSV acts as a bridge between your contact data and Outlook’s contact store. According to MyDataTables, mastering CSV workflows reduces manual data entry and minimizes errors when teams coordinate outreach or customer relationship management. When you import, you align fields like FirstName, LastName, Email, Company, and Phone with Outlook’s contact schema, which improves searchability, segmentation, and downstream workflows. In this section you’ll understand why a proper CSV import matters and how it affects data quality across your organization.
For most teams, the knockout factor is data hygiene: accurate names, correct emails, and well-formed phone numbers. A clean import helps you avoid duplicates, misassigned records, or missing contact details that can derail a campaign or a collaboration. If you’re currently migrating from another system, plan for a brief mapping exercise to reconcile field names with Outlook’s built-in fields. A deliberate approach now pays dividends in future imports and automations. As you read, keep in mind that even small inconsistencies in the CSV can cascade into issues in Outlook if not addressed upfront.
The goal of this guide is to give you a practical, repeatable process. You’ll learn both desktop and web workflows and you’ll see how to validate results, handle common hiccups, and set up routines to keep your contact lists synchronized with other data stores. Whether you manage a small team or a large customer database, these steps help you import confidently without wasting time on troubleshooting later.
Prerequisites and Data Readiness
Before you even open Outlook, take a moment to verify that your CSV is prepared for a smooth import. Outlook expects a column-per-field layout where each row is a single contact. If you have multiple emails, phone numbers, or addresses, choose the most relevant fields and keep extra data in separate notes or custom fields to avoid overloading Outlook’s default schema. Check encoding to ensure non-Latin characters render correctly; UTF-8 is the safest default. Removing invalid or blank rows reduces the chance of import errors. A quick round of deduplication at the source will save you time during Outlook import. Finally, ensure that you have a backup copy of the CSV in case you need to revert or redo the import.
You’ll also want to decide whether you will import only new contacts or update existing ones. Outlook’s behavior varies by version; some imports may create duplicates if a matching record already exists. If keeping the existing contacts intact is critical, plan to enable deduplication or use a post-import cleanup step. This preparation phase is where you minimize post-import edits and maximize data accuracy across platforms. As you prepare, keep your project goals in mind: consistent headings, clean data, and a clear mapping plan to Outlook fields.
Prepare Your CSV for Outlook
A successful import depends on how you structure your CSV. Start with a header row that uses simple, conventional field names that map cleanly to Outlook fields: FirstName, LastName, EmailAddress, Company, JobTitle, BusinessPhone, HomePhone, MobilePhone, Street, City, State, PostalCode, Country. If your data uses different names, you can rename the headers, or use the Outlook field mapping screen to align them during import. Ensure there are no merged cells in the header row and that each row contains a single contact.
Next, verify data formats for each column. Email addresses should be valid, phone numbers should follow a consistent format, and postal codes should match region conventions. If you have international contact data, consider including a dedicated Country or Region column. Save the file with UTF-8 encoding and a .csv extension. Finally, remove any completely blank rows and ensure there are no trailing commas that could create empty fields. A well-prepared CSV minimizes mapping friction during import.
Importing into Outlook Desktop
Outlook Desktop provides a straightforward path to import CSV contacts. Start by opening Outlook, then go to File > Open & Export > Import/Export. Choose Import from another program or file, select Comma Separated Values, and browse to your CSV file. In the next screen, select the destination Contacts folder. The critical step is mapping: match CSV headers to Outlook contact fields (e.g., FirstName to First Name, EmailAddress to Email). If a field isn’t perfect, use the map controls to align as closely as possible. Finish the wizard and start the import.
After import completes, go to the People view and review several records to confirm that names, emails, and phone numbers appeared correctly. If you notice mismatches, you can update individual contacts or re-run the import with adjusted mappings. If you have many duplicates, use Outlook’s built-in deduplication tools or a separate cleanup pass to merge or remove duplicates.
Importing into Outlook on the Web
Outlook on the Web (Outlook.com) supports CSV import as well, though the interface differs from the desktop client. Sign in to Outlook on the Web, click the App Launcher, then select People. In People, choose Manage > Import contacts. Click Browse and select your CSV file, then choose the target contacts folder if prompted. The web version will present mapping options; align CSV columns with Outlook’s fields just as you did for the desktop version.
During import, you’ll typically see a summary of how many contacts were added and any issues encountered. If some records could not be imported due to invalid data, check the error log (if shown) or re-run the import after correcting those rows in your CSV. Validate that key contacts (executives, teammates, customers) are present and correctly mapped in the People pane after the import finishes.
Validate and Clean Up After Import
Validation is the final gate before you start using the imported data. Open Outlook and navigate to the Contacts or People view to scan a representative sample of records. Check that the most critical fields—name, primary email, and primary phone—are accurate. Look for duplicates and use the built-in deduplication tools or manual merging where necessary to maintain a clean master list. If you maintain multiple contact sources (like a CRM or distribution lists), consider setting up a routine to merge or refresh Outlook contacts on a schedule.
Create a simple verification checklist: are all new contacts visible in search results? Do all mappings appear correctly in the detail view? Are there any fields that appear truncated or misformatted? If you plan to synchronize Outlook with another system, perform a round-trip test by updating a sample contact in one system and verifying the reflection in the other. A methodical post-import validation reduces follow-on issues and keeps your address book dependable.
Then, evaluate whether you want to set up future imports as a scheduled task or part of a data pipeline. Regular updates from a CSV source can be automated using scripts or integration tools, which saves time and ensures new contacts appear in Outlook promptly.
Common Pitfalls and Troubleshooting
Many import issues stem from misaligned headers, encoding problems, or inconsistent data formats. A typical pitfall is having headers with trailing spaces or nonstandard names such as First Name (with a space) instead of FirstName. Always trim whitespace and standardize header names before import. If you encounter an error during mapping, save a copy of the mapped field configuration for quick re-application in future imports.
Another frequent issue is character corruption for non-English names. Ensure CSV is UTF-8 encoded and avoid special characters that Outlook might misinterpret if the encoding is wrong. If you see missing emails or invalid values, filter the CSV to isolate problematic rows before re-importing. Finally, duplicates are a common aftereffect of multi-source imports; use the deduplication functionality or a dedupe rule to maintain a clean catalog of contacts.
Advanced Tips for Regular Imports
For teams performing recurring imports, consider creating a repeatable workflow. Store a master CSV with clean headers, and maintain a small script or macro to reformat the file to the exact Outlook headers you use. If you frequently map similar fields, you can save a mapping preset in Outlook (some versions support saved mappings). Consider enabling a daily or weekly import schedule if your data source updates regularly, so Outlook reflects changes with minimal manual intervention.
If you need cross-application synchronization, explore integration tools or Power Automate flows that trigger when the CSV file updates, automatically running an import into Outlook. Finally, document your process in a short internal guide so teammates can reproduce it, and set expectations about how soon new contacts appear in Outlook after the CSV file is updated.
Tools & Materials
- CSV file containing contacts(UTF-8 encoding; headers like FirstName, LastName, EmailAddress)
- Outlook Desktop app or Outlook on the Web(Desktop: Windows/macOS; Web: access via browser)
- Computer with internet access(Windows or macOS; Chrome/Edge/Firefox supported)
- Backup copy of the CSV(Keep a separate file in case you need to revert)
- Optional: A field-mapping reference(Helps during the import mapping step)
Steps
Estimated time: 30-60 minutes
- 1
Prepare the CSV
Open the CSV in a spreadsheet app, standardize headers to Outlook-friendly names, remove duplicates, and save as UTF-8 encoded CSV.
Tip: Use a single header row and avoid merged cells in headers. - 2
Open the Import Tool in Desktop
In Outlook, go to File > Open & Export > Import/Export and choose to import from another program or file.
Tip: Select Comma Separated Values as the file type. - 3
Choose destination and start mapping
Pick the Contacts folder as the destination and map CSV columns to Outlook fields (e.g., FirstName -> First Name, EmailAddress -> Email).
Tip: Use exact field mappings to prevent misaligned data. - 4
Run the import
Complete the wizard and let Outlook create or update contacts based on your CSV data.
Tip: If duplicates appear, plan a deduplication step after import. - 5
Validate imported records
Open a sample of newly imported contacts to verify names, emails, and phone numbers.
Tip: Check for any rows that failed to import and review the error message. - 6
Cleanup and deduplication
Run Outlook’s deduplication tools or manually merge duplicates as needed.
Tip: Deduplication reduces confusion in search results and distribution lists.
People Also Ask
Can I import multiple CSV files at once?
Outlook typically imports one file at a time. Combine files if needed, or perform separate imports and merge results.
Outlook usually handles one CSV at a time; you can import separately if you have multiple files.
What headers does Outlook expect?
Common headers include FirstName, LastName, EmailAddress, Company, and Phone. You can map them during the import.
Outlook expects headers like FirstName and EmailAddress; map them during the import.
What if a field doesn’t map correctly?
Adjust the header names in the CSV to match Outlook fields or remap during the import wizard.
If mapping fails, tweak headers or remap in the wizard.
Will importing overwrite existing contacts?
Imports typically add new contacts; duplicates can occur, so use deduplication after import.
Imports usually add; duplicates can happen, so run deduplication afterward.
Watch Video
Main Points
- Prepare a clean, UTF-8 CSV with clear headers
- Map fields carefully during import
- Verify data accuracy and deduplicate after import
- Test a small batch before full-scale imports