SQL Export Table to CSV: A Practical How-To
Learn how to sql export table to csv across PostgreSQL, MySQL, SQL Server, and SQLite with best practices for encoding, delimiters, headers, and automation. This MyDataTables guide walks you through reliable export workflows and validation for analytics and data sharing.

By the end of this guide, you will know how to sql export table to csv across major databases (PostgreSQL, MySQL, SQL Server, SQLite) using built in export commands or client tools. Youll learn how to choose a delimiter, handle headers, manage encoding, and validate the resulting file for downstream analytics. This process is essential for sharing data, backups, and data migration.
Understanding the export goal and audience
Exporting data from SQL into CSV serves multiple users across analytics, development, and business operations. With a CSV file, analysts can feed reporting tools, data scientists can prototype experiments, and engineers can migrate data between systems. The MyDataTables team emphasizes that a successful export begins with clear goals. Decide whether you need a header row, which delimiter to use, and the encoding. Consider whether the CSV will be opened in Excel, imported into a data warehouse, or consumed by an ETL pipeline. These decisions influence the syntax you will use and the performance characteristics of the export. For example, a CSV with a header and UTF-8 encoding is generally friendly for most tools, but some legacy systems prefer semicolon delimiters or a BOM marker. Also plan for automation if this export will run on a schedule or be triggered by an event. The more you know about the downstream consumers, the less you will need to rework the export later. In this section we align the export approach with your real world use case and outline the practical constraints that will save time later.
Choosing the right export method by engine
Different database engines expose different export mechanisms. PostgreSQL uses COPY for fast server side export; MySQL uses SELECT INTO OUTFILE or the mysql client; SQL Server relies on BCP or SQL Server Import and Export Wizard; SQLite can export via the sqlite3 shell. The gut check is to prefer server side exports for big data sets because they minimize memory usage and ensure consistent formatting. If you work locally or with a GUI, tools like pgAdmin or DBeaver can perform exports with a few clicks while still honoring encoding and header options. When teaching teams or sharing scripts, keep the engine and version details in the comments so future maintainers know which syntax was used and why. A well documented export routine makes downstream processes more reliable and easier to audit.
Formatting and encoding choices for CSV exports
CSV does not have a universal binary standard; its interpretation depends on the consumer. The first formatting decision is the delimiter. Comma is standard, but semicolon works better in locales that use comma as decimal separators. Next, decide about the header row and about quoting rules. Enclose fields containing the delimiter or line breaks in quotes and escape any internal quotes using the standard doubling method. Encoding matters for compatibility. UTF-8 without BOM is widely supported by data tools; some spreadsheets expect BOM at the start of the file. If your downstream system requires a specific encoding, adjust accordingly and test with sample data. Finally, consider line endings. Windows uses CRLF, Unix uses LF, and some tools tolerate both. A consistent choice reduces the chance of misparsed data when the file moves between systems.
Practical export workflows across engines
To illustrate, here are common export workflows you can adapt. In PostgreSQL, use COPY to export to a CSV file with a header. Example: COPY public.my_table TO '/tmp/my_table.csv' WITH (FORMAT CSV, HEADER TRUE, ENCODING 'UTF8'); In MySQL, you can export using the INTO OUTFILE clause once you have file privileges. For SQLite, use the sqlite3 shell and write directives like .headers on; .mode csv; .output /tmp/my_table.csv; SELECT * FROM my_table;. For SQL Server, the recommended approach is the BCP utility or the SQL Server Import and Export Wizard to generate a CSV.
Validation and automation
After export, validate the CSV by checking row counts against the source, sampling rows, and verifying the first and last lines. Use a simple checksum or diff to confirm reproducibility. For automation, create a small script to run the export and then run the validation steps as a post processing task, and schedule it using cron or Windows Task Scheduler. Always store credentials securely and monitor job status.
Tools & Materials
- Database credentials(Username and password or SSH key access)
- DB client or shell(psql, mysql, sqlcmd, sqlite3, or GUI tools)
- Output destination(Local path or network share with write permissions)
- Test dataset(Optional sandbox to validate export)
- Validation tooling(CSV validator or checksum script)
- Automation setup(Cron or Task Scheduler for periodic exports)
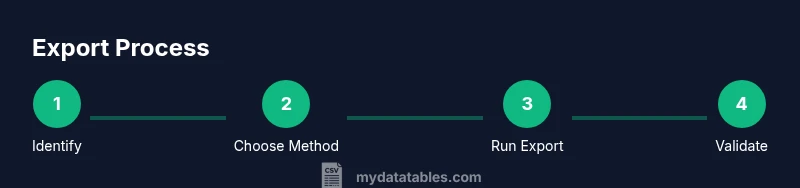
Steps
Estimated time: 1-2 hours
- 1
Identify target and format
Define which table to export and whether to include a header row, the delimiter, and the encoding. Prepare a small subset if testing first.
Tip: Draft a sample export command using a test table to verify format. - 2
Choose the export method
Select a method based on DBMS: COPY in PostgreSQL, INTO OUTFILE in MySQL, BCP in SQL Server, or sqlite3 export.
Tip: COPY is typically fastest for large data. - 3
Run the export
Execute the export command with the chosen method and ensure file permissions allow writing to the destination.
Tip: Use a test directory first to avoid overwriting production data. - 4
Validate the CSV output
Open the file to verify headers, row counts, delimiter consistency, and encoding. Compare a sample to the source table.
Tip: Check for escaped quotes and multiline fields. - 5
Handle edge cases and performance
For large tables, export in chunks or use server-side export features to minimize memory usage.
Tip: Consider streaming exports for very big datasets. - 6
Automate and monitor
Schedule the export and set up basic monitoring to ensure reliability.
Tip: Store credentials securely and rotate periodically.
People Also Ask
What is the easiest way to export a table to CSV from PostgreSQL?
The easiest built in method is the COPY command, e.g., COPY your_table TO '/path/file.csv' WITH (FORMAT CSV, HEADER TRUE); This exports the table to a CSV file with a header row.
Use PostgreSQL COPY to export to CSV with a header.
Can I export without a header row?
Yes. Remove the header by setting HEADER FALSE in the export command.
Export without headers by turning off the header option.
How can I export large tables without memory issues?
Use server-side exports and chunking to avoid memory pressure; streaming exports can help.
Export large tables using server side methods and chunking to stay within limits.
What encoding should I use for CSV exports?
UTF-8 is widely supported; use UTF-8 without BOM unless required by a tool.
Choose UTF-8 encoding; BOM is optional for some tools.
How can I automate exports securely?
Store credentials securely and rotate keys; schedule exports with restricted access.
Use secret storage and scheduled jobs with restricted access.
How should I handle quotes and commas in data?
Enclose fields with quotes and escape internal quotes by doubling them; ensure proper FORMAT CSV.
Escape internal quotes and quote fields containing delimiters.
Watch Video
Main Points
- Export with a clear format (header, encoding, delimiter).
- Choose the right DBMS method for performance.
- Validate output against source data.
- Automate exports to reduce manual work.