Create Table from CSV in PostgreSQL: A Step-by-Step Guide
Learn how to create a table from a CSV in PostgreSQL with safe loading, encoding checks, and validation. This MyDataTables guide covers COPY, schema design, and best practices for reliable data import.

By the end of this guide you will create a PostgreSQL table from a CSV file, load data efficiently, and validate the import. Core steps include confirming CSV encoding and headers, designing a matching table schema, using COPY or psql \copy, and verifying counts after import. This workflow helps analysts transform raw CSV data into a queryable database table.
CSV readiness and PostgreSQL environment
Before you attempt to create table from csv postgresql, ensure your CSV is ready and your PostgreSQL environment is prepared. According to MyDataTables, the most reliable CSV-to-table workflow starts with validating the CSV’s encoding (UTF-8 is widely preferred) and confirming whether the file includes a header row. You’ll also want to verify the target database, confirm you have a writable schema, and identify the user credentials you will use for the load. In practice, this means locating the CSV file, knowing its delimiter, and listing the columns in the order you expect to map them to SQL types. You’ll then design a plan that aligns each CSV column with a PostgreSQL data type. A well-prepared setup minimizes later catches, such as type mismatches, missing values, or encoding errors, and makes the actual import safer and faster. This foundational phase is essential for the accurate creation of a table from CSV data in PostgreSQL and sets the stage for scalable analytics.
Keywords: create table from csv postgresql, CSV encoding, headers, schema planning, data import safety
Designing a matching schema
The backbone of a successful import is a schema that mirrors the CSV structure. Start by listing each CSV column name, expected data type, and whether NULL values are permitted. Common types are TEXT for names, INTEGER or BIGINT for ids, NUMERIC for monetary values, and DATE or TIMESTAMP for dates. If your CSV contains optional fields, you can declare them as NULLABLE in PostgreSQL. For performance, consider choosing appropriate lengths for text fields (CHAR vs VARCHAR) and adding constraints that reflect real-world rules (e.g., UNIQUE for emails). It’s important to keep column order in mind; COPY relies on the order unless you name the target columns explicitly. Defining a clear mapping not only prevents type casting errors but also makes the import easier to monitor. MyDataTables notes that a precise schema reduces post-load cleanup and accelerates downstream analytics.
- Map each CSV column to an explicit PostgreSQL type
- Decide NULL handling and default values
- Consider indexing strategy after data loads
Handling common CSV issues
CSV files can be tricky. Ensure the delimiter matches your file (comma, semicolon, or tab), and confirm whether a header row exists. If quotes are used around values, understand how escapes are handled. Some CSVs include a Byte Order Mark (BOM) at the start; remove or account for it to avoid an extra column named “Column1.” If NULLs should be represented by a specific token (like \N) in your file, configure COPY accordingly. When dealing with large numeric fields, ensure there is no thousands separator. If there are embedded newlines inside quoted fields, COPY can handle them, but you must enable HEADER and correct DELIMITER. For safety, audit a small sample first and validate results with a few SELECTs. We’ll revisit these considerations when composing the final COPY command.
Pro tip: Always test with a 100–200 line subset before loading the full file to avoid long rollback times.
Creating the table in PostgreSQL
Creating a table to host your CSV data requires a clear SQL schema that matches the file structure. Begin with a CREATE TABLE statement that lists each column’s name and data type, plus any constraints you want (PRIMARY KEY, UNIQUE, NOT NULL). Here is a representative template you can adapt:
CREATE TABLE sales_import (
  id BIGINT PRIMARY KEY,
  customer_name TEXT,
  amount NUMERIC(10,2),
  sale_date DATE,
  status TEXT
);
This schema mirrors a hypothetical sales CSV with five columns. If your CSV has a different column order, you can either preserve order in the COPY statement or explicitly name the target columns to guard against reorderings. For large imports, consider creating a staging table first and validating data before advancing to the final table.
- Example: adjust column names/types to match your file
- Use NOT NULL for essential fields and NULL for optional ones
- Consider constraints to ensure data quality
Loading the data with COPY or \copy
PostgreSQL offers two powerful options to load CSV data: COPY (server-side) and \copy (client-side via psql). COPY requires the file to be accessible from the server filesystem, while \copy reads the file from the client machine and streams it to the server. A typical server-side load looks like:
COPY sales_import(id, customer_name, amount, sale_date, status)
FROM '/path/to/file.csv'
WITH (FORMAT csv, HEADER true, DELIMITER ',', NULL '', ENCODING 'UTF8');
If you are running from a local client, the equivalent with \copy is:
\copy sales_import(id, customer_name, amount, sale_date, status) FROM '/local/path/file.csv' WITH (FORMAT csv, HEADER true, DELIMITER ',', NULL '', ENCODING 'UTF8');Notes on performance: load in a single transaction when possible, and consider splitting very large files into chunks. Ensure the file encoding matches the server so text data is stored correctly.
Validation and verification after import
After loading, validate the import to catch mismatches early. Start with a basic row count check:
SELECT COUNT(*) FROM sales_import;Compare this with the number of rows in the CSV (if you have a source count). Inspect a random sample of records to confirm data types and formats look correct:
SELECT id, customer_name, amount, sale_date, status FROM sales_import ORDER BY id DESC LIMIT 20;Run additional checks for NULLs in non-nullable columns and range checks (e.g., amount >= 0, sale_date not in the future). MyDataTables analysis shows that a small validation pass immediately after import reduces downstream cleanup and re-loads. Keep a log of any discrepancies for remediation in a follow-up batch load.
Performance tuning and error handling
For large CSV imports, performance hinges on batch sizing and effective error handling. Use a transactional approach: BEGIN; LOAD; COMMIT. If errors occur, ROLLBACK to keep existing data intact. Import into a staging table first, validate rows, then INSERT into the final table, optionally with an INSERT ... SELECT that filters out bad rows. Tuning parameters such as work_mem and maintenance_work_mem can influence performance for large loads. Enable detailed server logging to capture COPY errors and bad records. If you foresee frequent loads, automate the process with a script that handles retries, logs errors, and notifies you when a load completes.
Pro tip: Maintain an audit column (loaded_at timestamp) to track when each row was imported.
Working with large CSV files
When dealing with very large CSV files (millions of rows), consider chunking the file into smaller segments and loading sequentially. This minimizes server memory usage and makes it easier to rollback a failed segment without reloading the entire dataset. Parallel loading is possible by splitting files and running multiple COPY commands concurrently on different partitions, provided you design unique keys to prevent conflicts. If available, use a dedicated staging schema or table to isolate the import from live data. Regularly monitor disk I/O and CPU usage during the import to detect bottlenecks early.
Portability and best practices
To ensure long-term reliability and portability of your workflow, keep a consistent naming convention for tables and columns, document data types, and store the CSV schema as code alongside your database migrations. Use UTF-8 encoding throughout, always include a header row, and prefer explicit column lists in COPY to guard against schema drift. Add constraints that reflect business rules, and create relevant indexes after the load to optimize analytics queries. Maintain versioned SQL scripts for schema evolution and keep a change log for CSV-CSV conversions.
Common pitfalls and troubleshooting
Common issues include encoding mismatches, incorrect delimiters, or missing headers. If you get an error like invalid input syntax for integer, verify the source column’s data type and ensure non-numeric values aren’t slipping into numeric columns. If COPY reports bad data files, load a small sample first to identify the problematic field. Another frequent pitfall is assuming the column order will remain constant; always prefer naming target columns in COPY if there is any risk of reordering. Finally, remember to test after every significant change to the load process.
Authority sources
- PostgreSQL COPY documentation: https://www.postgresql.org/docs/current/sql-copy.html
- PostgreSQL CREATE TABLE documentation: https://www.postgresql.org/docs/current/sql-create.html
- CSV on the Web - W3C: https://www.w3.org/TR/CSV11/
Tools & Materials
- PostgreSQL server or hosted database(Ensure you have CREATE rights and a target schema available.)
- CSV file to import(UTF-8 encoding preferred; include header if possible.)
- psql client or equivalent(Used for running COPY or \copy commands.)
- Text editor or IDE(For editing the CREATE TABLE and COPY statements.)
Steps
Estimated time: 60-90 minutes
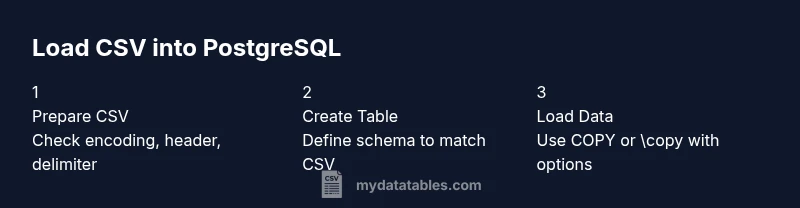
- 1
Prepare your CSV and environment
Confirm encoding (UTF-8), determine if there is a header, and note delimiter. Ensure you have access to a PostgreSQL database and a writable target schema. This step sets up the prerequisites for a smooth import.
Tip: Test with a small sample file to verify assumptions before full-scale load. - 2
Map CSV columns to SQL types
List each CSV column, pick an appropriate PostgreSQL data type, and decide NULLability. This mapping drives the CREATE TABLE definition and helps prevent type mismatches during COPY.
Tip: Aim for precise types (e.g., NUMERIC(10,2) for money) to minimize casting later. - 3
Create the target table
Write a CREATE TABLE statement that mirrors the CSV schema, including constraints like NOT NULL or PRIMARY KEY where appropriate.
Tip: If unsure, start with a staging table and move to the final table after validation. - 4
Optionally create a staging table
A staging table isolates the import, enabling validation before moving data to the production table.
Tip: Staged loads reduce risk of corrupting live data. - 5
Choose COPY method and prepare path
Decide between COPY (server-side) or \copy (client-side) based on file location. Prepare the file path and syntax accordingly.
Tip: Server-side COPY is faster when file access is on the server. - 6
Run the load command
Execute COPY or \copy with the target column list, format, and encoding options. Include HEADER if your CSV has a header.
Tip: Use a transaction to allow rollback on error. - 7
Validate the loaded data
Check row counts, sample records, and key constraints to ensure data integrity post-load.
Tip: Compare row counts with the source file when possible. - 8
Handle any errors and clean up
If errors occur, rollback or partial-load adjustments, re-run with corrected data, and re-validate.
Tip: Keep a log of errors for future prevention. - 9
Optimize for queries
Add indexes on commonly queried columns after the load and consider constraints to enforce data quality for analytics.
Tip: Indexing after load speeds up analytics without slowing imports.
People Also Ask
Do I need a header row in the CSV to import?
No, but COPY with HEADER false is needed if there is no header. If the file lacks headers, you must list all target columns in the COPY statement and ensure data aligns with column order.
You can import without a header, but you must specify the column list to match the data order.
Should I use COPY or \copy for loading?
Use COPY when the server can access the file path directly. Use \copy when loading from a local machine or client tool, as it streams data to the server.
Use COPY for server-side files, \copy for client-side loads.
How do I handle NULL values in the CSV?
Configure the NULL option in COPY to map a token like empty strings or \N to NULL in the database. Ensure consistency with your schema constraints.
Map your CSV NULL representation explicitly in the COPY options.
What if the data types don’t match during load?
Adjust the target column types or pre-process the CSV to cast values correctly. Import into a staging table first to catch and fix errors.
If types don’t match, fix the data or adjust the schema before final load.
Can I load multiple CSV files at once?
Yes, load each file separately, preferably into a staging area, and then merge into the final table using INSERT ... SELECT. This reduces risk and simplifies error handling.
Load them one by one and consolidate afterward to keep things safe.
How can I verify the import quality after loading?
Run counts, spot-check samples, and validate key business columns. Compare results with the source data if you have a line count.
Check row counts and sample records to ensure accuracy.
Watch Video
Main Points
- Map CSV to explicit SQL types
- Validate data after import
- Use staging for risky loads
- Choose COPY vs \copy based on file location
- Index after load for analytics