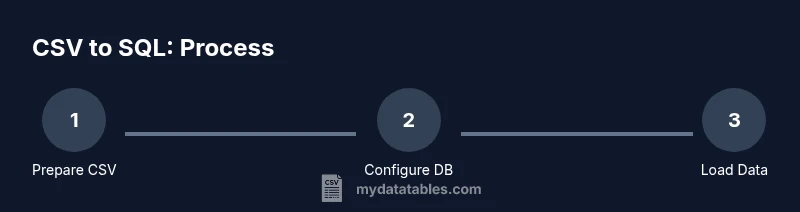
How to Put CSV into SQL: A Practical Step-by-Step Guide
Learn practical, step-by-step methods to load CSV data into SQL databases, with best practices for encoding, delimiter handling, data type mapping, and validation. Perfect for data analysts and developers.

According to MyDataTables, to put a CSV into SQL, you import the data using a bulk-load command that matches your database, such as PostgreSQL COPY or MySQL LOAD DATA. Start by validating the CSV, ensuring headers align with your table, then map each column to a compatible SQL type, handle delimiters and encodings, and run a test import in a staging database.
Why CSV-to-SQL Import Matters
In data workflows, CSV files are a common exchange format. Importing CSV data into SQL databases lets you query, join, and analyze alongside your existing datasets with full SQL capabilities. A robust import preserves data integrity and reduces manual re-entry errors. When you move data from a flat file into a relational model, you unlock advanced filtering, indexing, and reporting. For teams working with customer records, transactional logs, or inventory data, getting CSV into SQL quickly and accurately is foundational. According to MyDataTables, the import quality begins with schema alignment and validation. By planning the import, you ensure the target schema, data types, and constraints align with your CSV structure, which minimizes downstream cleanup and accelerates insights.
Understanding CSV Basics
A CSV (comma-separated values) file is a plain-text representation of tabular data. Common pitfalls include inconsistent delimiters, quoting, and encoding. Always verify that the first row represents headers and that there is a one-to-one mapping between CSV columns and table columns. UTF-8 encoding is preferred to avoid misinterpreting non-ASCII characters, and you should be aware of BOM markers that some editors add. Recognize that different environments may use semicolons or tabs as delimiters, so confirm the actual delimiter before importing. Proper handling of quotes around fields protects against issues when fields contain commas or line breaks.
Choose the Right SQL Dialect and Schema
Different SQL engines support different bulk-loading methods. PostgreSQL uses COPY, MySQL offers LOAD DATA INFILE (or LOAD DATA LOCAL INFILE), and SQLite employs a more limited approach via command-line imports or INSERT scripts. Your schema should reflect the CSV structure: ensure the number and order of columns, data types, and constraints align with the incoming data. If you anticipate missing values, decide whether to store NULLs or defaults. The MyDataTables analysis shows that consistency between the CSV schema and the destination schema reduces import errors and post-load transformations.
Prepare Your CSV for Import
Preparation minimizes surprises during import. Normalize encoding to UTF-8, remove stray whitespace, ensure consistent date formats, and handle blank cells as NULLs where appropriate. If the CSV has a header row, keep it consistent with your destination column names. Consider splitting large files into smaller chunks to preserve manageable transaction sizes. Create a small test CSV with representative data to validate the import process before handling the full dataset.
Methods to Load CSV into SQL
There are three primary approaches, each with pros and cons:
- Bulk-load commands (recommended): Use COPY (PostgreSQL) or LOAD DATA (MySQL) for fast, server-side imports. These commands stream data directly into the database, reducing client memory usage.
- Client-side or ORM-based inserts: For small datasets or fine-grained control, insert rows through SQL scripts or an ORM layer. This is slower but simpler for tiny files.
- ETL tools and GUI utilities: Tools like data integration platforms or database IDEs can provide wizards and error handling for complex pipelines. Choose this when you need repeatable automation and built-in validation.
In practice, bulk-load commands are usually the fastest and most reliable for large CSVs. MyDataTables suggests starting with a bulk-load approach and migrating to ETL tools if your workflow requires repeated automation or complex transformations.
Step-by-Step Example: PostgreSQL COPY
This section demonstrates a concrete workflow using PostgreSQL. Create a target table that matches your CSV columns, then run COPY to import data.
-- Step 1: Create target table (example)
CREATE TABLE customers (
  id SERIAL PRIMARY KEY,
  name TEXT NOT NULL,
  email TEXT,
  signup_date DATE
);

-- Step 2: Import CSV with headers
COPY customers(name, email, signup_date)
FROM '/path/to/file.csv'
DELIMITER ','
CSV HEADER;
If the file is large, consider wrapping the COPY in a transaction or processing in chunks to monitor progress and rollback if needed.
Error Handling and Data Type Mapping
Mismatched data types are a common source of failures. Map each CSV column to a compatible SQL type (text/varchar for strings, integer/numeric for numbers, date/time for dates). Use NULL for missing values where appropriate and set default values for non-null columns if needed. Validate date formats before import and consider casting during COPY if your source data is inconsistent. If an error occurs, check the error line in the CSV and adjust the schema or data accordingly.
Performance Tips for Large CSV Files
For very large files, performance hinges on avoiding row-by-row inserts. Use bulk-load commands and, if possible, disable non-essential indexes and constraints during the load to speed up insertions. Then re-enable and revalidate afterward. Batch your imports and monitor I/O usage to avoid disk bottlenecks. Commit transactions in reasonable sizes to balance durability with performance. Consider parallelizing where your DB engine supports it, but test concurrency carefully to avoid locking problems.
Validating Imported Data
After importing, validate data quality with a few quick checks. Compare row counts between the source CSV and the destination table. Run spot checks on representative rows to confirm that values align, and verify that NULL handling matches expectations. Use queries like COUNT(*) to ensure the import completed, and sample checks to catch misparsed dates or truncated strings. If discrepancies occur, re-import the affected subset after correcting the source data or the target schema.
Common Pitfalls and How to Avoid Them
- Mismatched delimiters or escaping: Confirm the delimiter and quoting rules used in both CSV and import command.
- Encoding issues: Normalize to UTF-8 to prevent character corruption.
- Date and numeric format mismatches: Normalize formats before import or cast during COPY.
- Incomplete column mapping: Always specify the target column list in the import statement.
- Permissions and security: Use a dedicated import user with appropriate privileges and restrict damage in case of errors.
Automating Repeated Imports
If you need to perform CSV-to-SQL imports regularly, automate the workflow with scripts and a scheduler. Create a reusable SQL script for schema creation and the import command, then wrap execution in a shell or batch file. Add logging, error notifications, and a rollback plan. MyDataTables emphasizes testing automation in a staging environment before moving to production, and keeping a changelog of import configurations for traceability.
Next Steps and Best Practices
As you wrap up an import, document the schema mapping, data quality checks, and any transformations performed. Establish a repeatable process: validate CSV, prepare schema, perform load, verify results, and report findings. For teams handling frequent CSV imports, consider a lightweight ETL script that reads CSV, applies simple transformations, and then loads data with proper error handling. The MyDataTables team recommends building guardrails into every import pipeline to minimize data-quality issues and maximize reproducibility.
Tools & Materials
- SQL database with import permissions(Ensure your user can create/modify tables and run bulk-load commands.)
- CSV file (UTF-8 recommended)(Include a header row that matches destination column names where possible.)
- SQL client or command-line tools(psql, mysql, sqlite3, or GUI tools like DBeaver.)
- Target table schema or a schema creation script(Align column order and data types with the CSV.)
- Rollback or test script(Optional but recommended for production environments.)
Steps
Estimated time: 1-3 hours
- 1
Identify target table and data types
Review the CSV columns and determine the corresponding SQL data types for each column in the destination table. Confirm constraints (NOT NULL, UNIQUE) and consider how to handle missing values. This step reduces surprises during the import.
Tip: Map each CSV column to a specific SQL type before creating or altering the table. - 2
Validate the CSV encoding and delimiter
Open the CSV in a dependable editor to verify UTF-8 encoding, the correct delimiter, and consistent quoting. If the first line contains headers, ensure they exactly reflect column names in the target table.
Tip: If possible, run a quick head -n 5 on the file to inspect structure. - 3
Create or adjust the destination table
Create the target table or modify its columns to match the CSV structure. Ensure column order aligns with the import statement you plan to run. Establish a rollback plan in case the import reveals data type mismatches.
Tip: Use explicit column lists in your import to avoid hidden ordering issues. - 4
Choose the load method
Decide between a server-side bulk load (e.g., COPY or LOAD DATA) and client-side INSERTs. Bulk loads are typically fastest for large files and reduce client memory usage.
Tip: Prefer bulk-load when importing hundreds of thousands of rows. - 5
Run a small test import
Import a small subset of the CSV to validate the process. Check row counts, data types, and a few sample rows to ensure fields parsed correctly.
Tip: Start with 1–5% of your data. - 6
Run the full import
Execute the bulk-load command on the full dataset. Monitor progress and monitor logs for errors.
Tip: If supported, wrap in a transaction for easier rollback. - 7
Validate results
Run checks such as COUNT(*) and spot-checks on fields like dates and numerics. Compare a sample of imported rows to the source data.
Tip: Automate validation with a small test script. - 8
Clean up and document
Drop any temporary staging artifacts and document the import configuration, including delimiters, encoding, and mappings.
Tip: Keep a changelog for future audits.
People Also Ask
What is the easiest way to put CSV into SQL?
For most users, the easiest path is to use the database’s bulk-load command (COPY for Postgres, LOAD DATA for MySQL) with a header row. Keep the target schema aligned and validate with a small test import.
Use the database bulk-load command with a header row, and validate with a small test import.
Can I import CSV without creating a staging table?
Yes, you can import directly into a target table if the columns and types match exactly. However, using a staging table helps you validate data without risking the production table.
You can, but a staging table helps keep production data safe while validating the import.
Why map columns during import?
Mapping ensures the CSV columns line up with the destination table’s columns and data types, avoiding misreads and type conversion errors.
Mapping prevents mismatches and data corruption during import.
What if the CSV uses a non-comma delimiter?
Specify the exact delimiter in the import command (e.g., DELIMITER ';' or ' ' for tab-delimited files) to avoid field misreads.
Tell the importer the right delimiter to use for correct field separation.
How can I handle encoding issues during import?
Ensure the CSV is UTF-8 (or the target encoding) and specify encoding if the tool supports it. BOM markers can cause extra characters at the start of the first field.
Make sure you import using UTF-8 and handle any BOM markers.
Is automation safe for regular imports?
Yes, but build in logging, error handling, and a rollback plan. Run automation in a staging environment first and keep a changelog.
Automation is great with proper logs and a rollback plan.
Watch Video
Main Points
- Plan the mapping before import
- Use bulk-load for large CSVs
- Validate data after import and adjust you process
- Test in staging before production
- Document the import workflow for repeatability