PNG to CSV: Practical Guide to Extract Data from Images
Learn how to convert data from PNG images into CSV format using OCR, preprocessing, and parsing techniques. This step-by-step guide covers workflows, tools, validation, and best practices for reliable PNG-to-CSV conversions.

You can convert PNG to CSV by extracting structured data from the image using OCR and layout-aware processing. Start by clarifying whether the PNG contains a table, text blocks, or encoded data (like a QR/barcode). Then preprocess the image, run OCR, and post-process results into a CSV with clean headers and consistent delimiters.
What PNG to CSV is and when to use it
PNG to CSV is the process of turning data embedded in PNG images into comma-separated values for analysis and automation. It enables you to treat image-based data as a structured dataset that can be loaded into spreadsheets, databases, or data pipelines. In practice, you’ll either extract tabular data from a screenshot or convert text blocks into a structured format, depending on the PNG's content.
According to MyDataTables, the most reliable PNG-to-CSV workflows start with a clear understanding of what the image contains: a true table, scattered text, or encoded data such as a barcode or QR code. The MyDataTables team found that choosing the right approach up front reduces later rework and speeds up the overall process. This guide outlines practical steps, tools, and checks to help you build a repeatable pipeline.
Understand your PNG content: tables, text, or encoded data
Not all PNGs contain the same type of information. Some images show a clean table with clearly separated rows and columns, others present freeform text blocks, and some encode data in barcodes or QR codes. Distinguishing these cases up front saves time by selecting the right parsing strategy. If a PNG contains a table, you’ll aim to preserve row and column structure; if it’s free text, you’ll extract blocks and then map them to fields; if it houses a barcode, you’ll decode it directly.
Based on MyDataTables Analysis, 2026, the most reliable PNG-to-CSV workflows start by a quick visual check, followed by targeted preprocessing tailored to the image type. This helps you avoid attempting a one-size-fits-all OCR, which often yields messy outputs and extra cleanup.
Image preprocessing for OCR accuracy
OCR accuracy depends as much on image quality as on the OCR engine you choose. Start by converting color images to grayscale to reduce noise, then apply simple enhancements such as contrast stretching or adaptive thresholding. If the image is skewed, perform deskewing to align text and table lines. Cropping to the region of interest minimizes irrelevant data, and denoising can reduce speckle that confuses OCR. When working with a table, you may also segment columns to preserve structure. These steps increase character recognition rates and reduce post-processing effort.
Tip: Save preprocessed images for auditing. If multiple PNGs follow the same format, reuse preprocessing settings to maintain consistency.
OCR and data extraction workflow
Choose an OCR tool that supports layout analysis and table-aware extraction. Open-source options like Tesseract (via pytesseract) offer flexible configuration; for complex layouts, try advanced engines or cloud-based APIs that provide better table parsing. Use a page segmentation mode (PSM) and an OCR engine mode (OEM) that suit your data: for tables, PSM 6 or 7 often works well, while free text benefits from a standard mode. Run OCR on the preprocessed image and export the raw text or structured output. The goal is to obtain a representation that can be parsed into rows and columns in a later step.
After OCR, you’ll need to map the extracted text into a structured form, keeping headers, units, and data types intact to avoid misinterpretation.
Post-processing: turning OCR output into structured CSV
OCR output is rarely perfectly structured. The next step is to parse the text into a tabular representation, align columns, and clean tokens. Use heuristics to detect rows (line breaks) and columns (consistent separators or alignment cues). Create a CSV with clear headers and consistent delimiters (comma or semicolon, depending on locale). Normalize numeric values, dates, and units, and validate that each row contains the expected number of fields. Store metadata about language, OCR engine, and preprocessing steps to reproduce results later. These practices yield a CSV file ready for analysis or import into a data pipeline.
If you’re working with multiple PNGs, consider writing a small script to automate this parsing stage and produce a consistent CSV schema across files.
Validation and quality checks for CSV data
Data quality is critical when converting from images. Start with structural checks: header names, column counts, and consistent row lengths. Then perform spot checks on random rows to compare the OCR-derived values with the source image visually. Validate numeric fields for proper formatting, dates for valid ranges, and strings against expected categories when applicable. If discrepancies are found, revisit the preprocessing or OCR configuration and re-run. Document any manual corrections so others can reproduce the results and maintain trust in the dataset.
Sample workflow: a practical example in Python
This section outlines a practical end-to-end workflow you can adapt. Begin by loading the PNG, preprocessing as described, running OCR with pytesseract, and parsing the text into a DataFrame. Apply data type inference to cast columns as integers, floats, or dates, and then export to CSV with UTF-8 encoding. If your image contains a table, leverage simple heuristics to split lines into rows and fields into columns. For barcodes, add a separate decoding step. Finally, run a quick validation pass to ensure no missing critical fields and that the CSV matches expectations. This modular approach makes it easier to swap out OCR engines or adjust parsing rules while preserving a consistent output format.
Alternatives and when to skip OCR
In some cases, OCR may be impractical or unnecessary. For PNGs that are simple charts or graphs, consider generating CSV by manually transcribing the data or using a dedicated data extraction tool that recognizes chart labels. If the PNG is a high-resolution scan of a printed table, it may be faster to convert with a specialized service that offers improved accuracy. For barcodes or numeric codes, decoding the symbol directly is often faster and more reliable than OCR. Always weigh the time and accuracy trade-offs before choosing a workflow.
Tools & Materials
- Python 3.x(Recommended version 3.8+)
- pytesseract(OCR wrapper; install via pip)
- Tesseract OCR engine(Install and configure tessdata path)
- Pillow (PIL)(For image loading and preprocessing)
- OpenCV (opencv-python)(Optional, for preprocessing)
- pandas(For CSV construction)
- input PNG file(Path to the image to convert)
Steps
Estimated time: 60-120 minutes
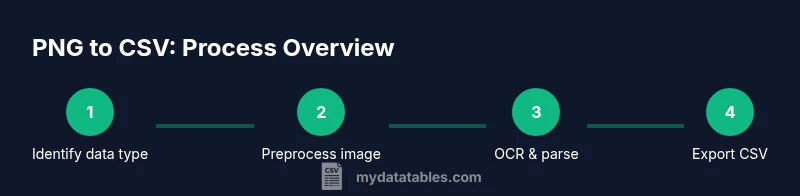
- 1
Identify data type in PNG
Inspect the image to determine whether it contains a tabular region, scattered text, or encoded data. This early decision guides which OCR strategy to use and how to structure the eventual CSV. Take a quick screenshot of representative regions for testing.
Tip: Capture a representative region to test OCR sensitivity - 2
Set up your environment
Create a clean Python environment, install pytesseract, Tesseract, Pillow, and pandas, and verify path configurations. This ensures reproducible results and avoids version conflicts.
Tip: Use a virtual environment to keep dependencies isolated - 3
Preprocess the image for OCR
Convert to grayscale, adjust contrast, and crop to the region of interest. Deskew and denoise as needed to improve character recognition and preserve table layout when present.
Tip: Save preprocessed images to audit preprocessing choices - 4
Run OCR and extract raw text
Apply the OCR tool with layout-aware settings to extract text with structure. Export as plain text or a structured intermediary format suitable for parsing.
Tip: Experiment with PSM/OEM settings to optimize for your image - 5
Parse OCR output into a tabular form
Split lines into rows and fields into columns using whitespace, delimiters, or layout cues. Build an intermediate data frame with headers that reflect the actual data.
Tip: Preserve header names and units for clarity - 6
Clean and normalize data
Cast numeric fields, standardize date formats, and unify units. Remove stray characters introduced by OCR errors and ensure consistent data types across all rows.
Tip: Create a small validation set to test normalization rules - 7
Export to CSV with UTF-8 encoding
Write the final DataFrame to a CSV file using UTF-8. Choose a delimiter suitable for your locale and ensure a reliable header row for downstream ingestion.
Tip: Document the CSV schema and encoding in a README - 8
Validate and iterate
Check a sample of rows against the source image, adjust preprocessing or OCR settings if mismatches are found, and re-run as needed to improve accuracy.
Tip: Automate re-runs for new PNG batches
People Also Ask
What is PNG to CSV?
PNG to CSV is the process of converting data from PNG images to CSV format.
PNG to CSV means pulling data from image files into a CSV.
Do I need programming to complete this task?
Not necessarily, but code provides repeatability and easier automation for batches.
You can use software, but code helps automation.
What are common OCR errors and how can I fix them?
OCR can misread characters; apply post-processing, dictionaries, and manual checks.
OCR errors happen; fix via post-processing.
How do I validate the resulting CSV?
Check headers, column counts, and sample rows against the source image.
Validate by spot-checking data.
Can I automate PNG to CSV fully?
Yes, build a repeatable script or pipeline to process batches of PNGs.
Yes, you can automate with a script.
What if the PNG contains a barcode or QR code?
Decode the barcode/QR first, then place decoded text into CSV.
Decode barcodes first.
Watch Video
Main Points
- Start with data type identification (table vs text).
- Preprocess images to maximize OCR accuracy.
- Post-process OCR to build clean, consistent CSV.
- Validate CSV with spot checks and sample rows.
- Automate the workflow for repeatable results.