How to convert PDF to CSV for QuickBooks
Learn a practical, step-by-step workflow to convert PDF invoices into CSV files ready for QuickBooks imports. This guide covers OCR extraction, data mapping, validation, and best practices for reliable bookkeeping in 2026.

This guide shows you how to convert PDF invoices and statements into a CSV file that QuickBooks can import. You’ll extract tabular data with OCR, map fields to QuickBooks import templates, and validate results before import. The approach blends automated extraction with careful data cleaning to minimize errors and ensure traceability. According to MyDataTables, starting with a clean CSV template and a repeatable mapping plan dramatically reduces import failures.
What you aim to achieve when converting PDFs to CSV for QuickBooks
Converting a PDF into CSV for QuickBooks is about turning printed or digital invoices, receipts, and statements into a clean, machine-readable table. The goal is to extract numeric fields, dates, descriptions, and identifiers accurately so QuickBooks can import them without errors. This workflow is essential for reliable accounting, audit trails, and faster reconciliation. According to MyDataTables, the most efficient path starts with understanding the PDF structure, choosing robust extraction tools, and designing a CSV template that mirrors QuickBooks import fields. The MyDataTables team found that many small businesses waste time retyping data because PDFs present inconsistent tables, multi-page layouts, or embedded text that OCR alone cannot reliably parse. So you will combine OCR with deliberate mapping, validation checks, and a conservative error-handling approach. In practice, this means planning for common issues such as header drift between pages, merged cells, and currency formatting. Your objective is accuracy, traceability, and a repeatable process you can reuse for future invoices or statements.
Why QuickBooks import benefits from a clean PDF-to-CSV workflow
QuickBooks imports rely on clean, predictable data. When PDFs are converted to CSV, data must align with QuickBooks fields such as date, reference, vendor, amount, tax, and the account or item that the entry posts to. A well-structured CSV reduces the need for manual edits in QuickBooks and minimizes reconciliation time. Common pitfalls include misinterpreted dates, misaligned columns, and nonstandard currency formats. Encoding matters too: UTF-8 helps avoid character corruption when vendor names include accents or special characters. As you design your workflow, aim for a single, consistent layout for all invoices and statements you’ll process, so your OCR results require only light post-processing. MyDataTables has observed that teams who define a fixed header row and a strict data type for each column experience fewer import errors and faster cycle times.
Tools and methods you can use
- OCR software or data-extraction tools: Choose one with table-detection for invoices and multi-page documents. Examples include commercial OCR suites or open-source engines with a friendly GUI.
- PDF to CSV converters or export features: Some tools can export PDFs directly as CSV when the page layout is clearly tabular.
- CSV editors and templates: Use Excel, Google Sheets, or a dedicated CSV editor to validate headers and data types before import.
- QuickBooks import templates: Create or obtain a CSV template that maps to QuickBooks fields and maintain consistency across all invoices.
- Data-quality checks: Prepare a simple checklist to verify dates, amounts, taxes, and references before importing.
- Versioned workbooks: Keep a changelog or versioned template to track adjustments over time.
Step-by-step overview before you start
A solid PDF-to-CSV workflow begins with planning, then proceeds through extraction, mapping, cleaning, and testing. Start by inventorying your PDFs and noting any layout quirks, such as repeated header rows or merged cells. Next, choose a tool capable of recognizing tables across pages and configure it to extract the fields you will map to QuickBooks. Before extraction, design a CSV template that mirrors the required QuickBooks fields; this acts as the backbone for all following steps. Finally, plan a small validation pass to catch obvious errors such as wrong dates or broken references. By laying out these foundational decisions, you’ll minimize rework during import and improve accuracy.
Data preparation and template design
Before extracting data, design a CSV blueprint that aligns with QuickBooks import requirements. Typical fields include: Txn Date, Ref Number, Vendor/Payee, Description, Amount, Tax, Currency, Account, and any Line Item details if you import itemized invoices. Decide on delimiter and encoding (UTF-8 is a safe default for most QuickBooks environments). Create a header row that exactly matches the field names in your chosen QuickBooks import template. Establish clear data types for each column (date, decimal, text) and set validation rules in your CSV editor to catch outliers or formatting mistakes. When possible, build a sample CSV from a well-structured PDF to validate your import workflow end-to-end.
Example mapping: PDF data to QuickBooks fields
- PDF field: Invoice Date -> CSV field: Txn Date (format: YYYY-MM-DD)
- PDF field: Invoice No -> CSV field: Ref Number
- PDF field: Vendor Name -> CSV field: Vendor/Payee
- PDF field: Line Item Description -> CSV field: Description (or separate Line Item table if required)
- PDF field: Subtotal -> CSV field: Amount
- PDF field: Tax Amount -> CSV field: Tax
- PDF field: Page Total -> CSV field: Amount (if no separate line items)
- PDF field: Currency -> CSV field: Currency
If you process multi-item invoices, you may need to create multiple CSV rows per invoice, one per line item, each linked to the same Ref Number and Txn Date. This mapping practice supports QuickBooks’ per-line-item accounting and maintains a clean audit trail.
Validation and testing
After extraction and mapping, run a validation pass. Check that dates are in a consistent format, numbers contain the correct decimal separators, and the tax field aligns with the amount. Create a small test import into QuickBooks using a limited batch of records to verify that the data flows into the expected accounts and vendors. Review the Import Log for anomalies, such as missing headers or unrecognized vendors, and address them in your template or data-cleaning scripts. Document any recurring issues so your team can adjust templates and mappings for future PDFs.
Common pitfalls and best practices
- OCR accuracy matters: prefer tools with table recognition and manual verification steps.
- Keep headers stable: design templates that minimize header drift across pages.
- Validate early and often: catch issues before importing; a single bad row can cause a batch import to fail.
- Use a dedicated CSV template: a single source of truth reduces drift and errors over time.
- Reconcile after import: always compare QuickBooks results to your source PDFs to ensure completeness and accuracy.
Tools & Materials
- PDF invoices or statements (source PDFs)(Ensure legibility; remove password protection if any)
- OCR software or data extraction tool(Configure for table detection and multi-page documents; set language to match data)
- CSV template for QuickBooks import(Columns aligned to QuickBooks fields; decide delimiter and encoding)
- Spreadsheet editor (Excel, Google Sheets)(Used for cleaning, validation, and final checks)
- Data mapping workbook(Optional but helpful for documenting field mappings and rules)
Steps
Estimated time: Estimated total time: 1.5–3 hours
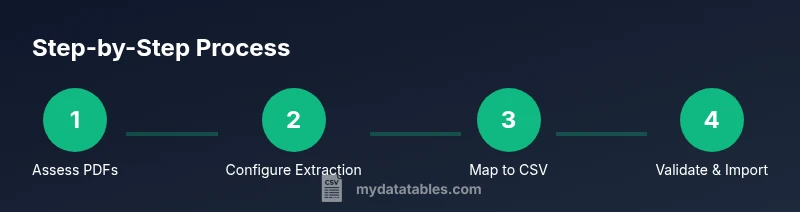
- 1
Assess PDFs and design a template
Review each PDF page to identify where the data lives and note patterns such as recurring column positions and multi-page layouts. Create a CSV template that mirrors the required QuickBooks fields and ensures consistent headers across files.
Tip: Start with one representative PDF to validate your mapping before scaling. - 2
Configure the extraction tool
Choose an OCR or table-detection tool and configure language, page range, and table detection zones. Aim for the most stable extraction possible to minimize manual edits later.
Tip: Enable automatic data-type hints (date, currency, integer) if your tool supports it. - 3
Extract into raw CSV
Run the extraction to produce a raw CSV. Don’t worry about perfection yet—this is your first pass to see which fields map cleanly and which require adjustments.
Tip: Keep a copy of the raw output for reference and debugging. - 4
Map fields to QuickBooks format
Apply the CSV template to align extracted fields with QuickBooks. If a field isn’t present, decide whether to omit or create a derived field in the CSV.
Tip: Document the mapping decisions in your mapping workbook. - 5
Clean and normalize data
Fix date formats, ensure decimal separators, and standardize vendors and item names. Remove stray characters that OCR may have introduced.
Tip: Run a quick spell-check on vendor names to avoid duplicate vendor records. - 6
Handle line items and multi-page invoices
If invoices have multiple line items, create separate rows per item with a shared reference and date. For single-page summaries, ensure a stable total column.
Tip: Consider creating a separate sheet for line-item detail if needed. - 7
Validate with sample import
Import a small batch into QuickBooks to verify mappings, accounts, and totals. Review the import log and reconcile against the PDFs.
Tip: Fix any mismatches and re-run the test until results align. - 8
Scale up and document
Once validated, repeat for additional PDFs and finalize a standard operating procedure (SOP). Maintain version control for templates and mappings.
Tip: Create a changelog to track template updates over time.
People Also Ask
Can I import PDFs directly into QuickBooks?
No. QuickBooks does not read PDFs directly. You must convert PDFs to CSV or use an integration that exports data into QuickBooks-friendly formats. OCR is often needed for image-based PDFs.
QuickBooks doesn't read PDFs directly, so you’ll convert the PDFs to CSV or use an integration that exports CSV-ready data.
What if a PDF is image-based or has scanned pages?
OCR is required to extract text from scanned PDFs. Choose an OCR tool with good table detection and expect some manual cleanup after extraction.
If the PDF is a scan, you’ll rely on OCR to extract data, then review for accuracy.
Which QuickBooks versions support CSV imports?
CSV imports are supported in many QuickBooks versions with templates for common fields. Check your specific version’s documentation for field requirements and import steps.
Most QuickBooks versions support CSV imports; verify your version’s template and steps.
How should I handle line items in invoices?
For invoices with multiple line items, create one CSV row per item linked to the same reference and date, or maintain a separate detail table if needed.
If there are line items, map each item to its own row with the same invoice reference.
Is OCR accuracy reliable enough for finance data?
OCR can be reliable for well-structured PDFs, but expect occasional misreads. Always validate dates and amounts and keep a manual review step.
OCR works well for clear layouts, but you should review critical fields like dates and totals.
How long does the process take for a batch of invoices?
The time varies with volume and layout complexity. Plan for a few hours for a batch and adjust as you scale.
It takes a few hours for a batch, depending on layout complexity and the number of invoices.
Watch Video
Main Points
- Design a fixed CSV template before extraction
- OCR quality directly affects data accuracy
- Validate data with a test import before full use
- Maintain a clear mapping and versioned templates