Import CSV Files into QuickBooks Online: Step-by-Step
Learn how to import CSV data into QuickBooks Online for customers, vendors, accounts, and products/services. This guide provides prep steps, field mapping, nine-step import workflows, validation tips, and troubleshooting to keep your books accurate.

Yes. QuickBooks Online supports importing CSV data for select records such as customers, vendors, chart of accounts, and products/services. To do this, prepare a properly formatted CSV, map fields to QuickBooks Online fields, and use the Import Data tool. This guide walks you through prerequisites and step-by-step steps to succeed.
Overview of CSV imports in QuickBooks Online
Can you import CSV files into QuickBooks Online? The short answer is yes for certain data types. The ability to import via CSV streamlines onboarding and data migration, especially when you have existing records outside QuickBooks. In practice, you’ll import discrete datasets (like customers, vendors, chart of accounts, and products/services) one at a time, then verify each import for accuracy. According to MyDataTables, planning your data structure before import reduces errors and saves time in the long run. This means setting up a consistent header format, choosing the right date and number formats, and validating your data against QuickBooks’ field requirements before uploading.
Importing data types you can bring in
QuickBooks Online supports CSV imports for several core data types, including customers, vendors, chart of accounts, and products/services. Each data type has its own template and required fields, so you’ll prepare separate CSV files for each category. You’ll also find that some more advanced data, such as opening balances or custom fields, may require specific formats or multipart steps. Always start with a small test batch to confirm field mappings and validation rules before a full-scale import.
Tools & Materials
- Computer with internet access(Stable connection; avoid interruptions during upload)
- QuickBooks Online account(Ensure you have Import Data access (or the Accountant/Advisor role as applicable))
- Prepared CSV files(UTF-8 encoding preferred; include a header row with exact field names)
- Field mapping reference(Keep a checklist handy to map CSV headers to QuickBooks fields)
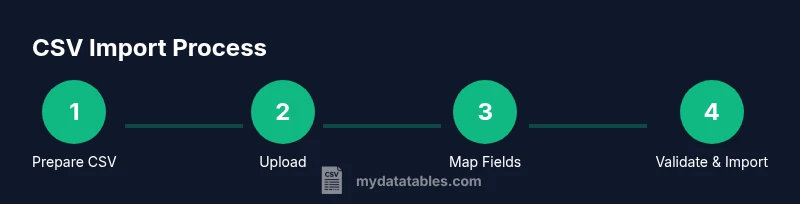
Steps
Estimated time: 1-2 hours
- 1
Prepare your CSV with required headers
Create a CSV file for the data type you’re importing (customers, vendors, accounts, or products/services). Include all required fields as defined by QuickBooks’ template. Save a backup copy of the original data before loading anything into QuickBooks Online.
Tip: Use UTF-8 encoding and avoid special characters that QuickBooks may misread. - 2
Back up existing QuickBooks data
Although imports are designed to augment your data, a backup ensures you can revert if something goes wrong. If you’re using QuickBooks Online Accountant, you may have additional restore options.
Tip: Document the date and scope of the backup for audit trails. - 3
Open Import Data in QuickBooks Online
In QuickBooks Online, go to the Settings (gear icon) and select Import Data. Pick the data type you’re importing (Customers, Vendors, Chart of Accounts, or Products and Services).
Tip: If Import Data isn’t visible, confirm your user role has the necessary permissions or switch to an account with import capabilities. - 4
Upload your CSV file
Choose the prepared CSV file and upload it. QuickBooks will present a preview and prompt you to map headers to its fields.
Tip: If you encounter a non-supported character, fix encoding before uploading. - 5
Map CSV headers to QuickBooks fields
Create a field-to-field mapping so QuickBooks recognizes each column. Use the exact QuickBooks field names when possible to minimize confusion.
Tip: Aim for consistent, descriptive headers; avoid spaces or special symbols that complicate mapping. - 6
Validate and import the data
Review the mapped fields and run the validation. If errors appear, fix the source CSV and re-import a smaller batch to isolate issues.
Tip: Start with a 5–10 record test import to catch common formatting mistakes. - 7
Review import results in QuickBooks
After import, check the affected lists (customers, vendors, accounts, or products) for completeness and accuracy. Look for missing fields, duplicates, or misclassifications.
Tip: Run a quick spot-check on 5–10 records from the import to verify consistency. - 8
Handle validation errors
If validation errors occur, export the error list, fix the root causes (bad headers, invalid accounts, or mismatched mappings), and re-run the import for the affected subset.
Tip: Keep a log of common error messages and the fixes you apply. - 9
Finalize and document the import
Document the import batch, including date, data type, row counts, and any adjustments. This supports audits and helps onboarding future data loads.
Tip: Store your mapping templates for reuse in future imports.
People Also Ask
Can QuickBooks Online import all CSV data types, or only some?
QuickBooks Online supports importing several core data types via CSV, including customers, vendors, chart of accounts, and products/services. More complex data may require separate steps or different templates.
Yes, for most common data types you can import via CSV, but some data may require separate templates or additional steps.
What should I do if the import fails with validation errors?
Review the error message, fix the offending field in your CSV (such as a mismatched header or invalid value), and re-run the import for the affected records. Start with a small subset to isolate the issue.
Check the error details, correct your CSV, and re-import the affected rows.
Do I need to back up before importing CSV data?
Yes. While imports are designed to augment data, creating a backup helps you revert if something goes wrong and supports auditing.
Backing up first is a good practice in case you need to revert.
What encoding should my CSV use for best compatibility?
UTF-8 encoding is generally recommended to minimize character interpretation issues during the import process.
Use UTF-8 encoding to avoid character problems.
Can I import multiple data types in a single operation?
Imports are typically performed per data type (customers, vendors, accounts, etc.). You’ll repeat the process for each dataset to maintain clear mappings and error handling.
Imports are usually done one data type at a time.
Is there a limit to CSV file size for QuickBooks Online imports?
QuickBooks Online imposes practical limits based on account type and plan; smaller, staged imports reduce the risk of timeouts and errors.
Keep large imports smaller and staged to avoid timeouts.
Watch Video
Main Points
- Prepare clean, well-formed CSV files.
- Map fields carefully to QuickBooks Online fields.
- Test with small imports before large batches.
- Validate data and review results after import.
- Document mappings and keep backups for future imports.