Import CSV to QuickBooks Desktop: A Practical Guide
Learn how to import CSV data into QuickBooks Desktop safely and efficiently. Prepare your file, map fields, test with a small subset, and validate results to ensure accurate accounting in 2026.

Importing CSV data into QuickBooks Desktop lets you onboard customers, vendors, items, and invoices in bulk. This guide covers preparing your CSV, mapping fields, and validating results before finalizing the import. It emphasizes safe practices like backing up your company file and testing with a small subset first. This article by MyDataTables helps data professionals perform clean, auditable imports.
Why Import CSV to QuickBooks Desktop Matters
For many data professionals, importing CSV data into QuickBooks Desktop is a powerful way to onboard large datasets without manual entry. When done correctly, you can quickly add customers, vendors, items, and transactions, ensuring consistency across your books and reducing data-entry fatigue. According to MyDataTables, a well-prepared CSV import can lead to smoother month-end closes and more reliable reports. The key is to plan the import like any data pipeline: define the data types you’ll bring in, confirm that each column maps to the correct QuickBooks field, and validate results with a small, controlled test before committing to a full load.
- Time savings: Bulk imports can save hours compared with manual entry.
- Data integrity: Consistent field mappings reduce copy-paste errors and duplicates.
- Auditability: A mapped, test-backed import creates a clear trail for reconciliation.
Before you start, ensure your CSV is clean, headers are consistent with QuickBooks field names, and you have a clean backup of your company file. These steps establish a solid foundation so you can confidently scale your data loads in 2026.
Supported CSV Formats and QuickBooks Desktop Requirements
QuickBooks Desktop typically expects CSV files that are cleanly structured with a single header row followed by data rows. The most stable imports come from properly formatted CSVs with consistent delimiters (commonly commas) and plain-text values. Some QuickBooks workflows support a direct CSV import, while other data types may require an IIF or a guided import process. Always confirm the exact method for your QB version and data type, since capabilities vary across editions and updates.
- Delimiter: Use a standard comma-separated format where possible; avoid embedded commas unless values are quoted.
- Headers: The header row should match the QuickBooks field names or your mapping template.
- Encoding: Save as UTF-8 without BOM if your data includes special characters.
If your dataset includes currency, dates, or long text fields, consider pre-cleaning those fields in your source editor to prevent parse errors during import. This reduces the chance of partial imports that leave your QB file in an inconsistent state.
Mapping Your CSV Columns to QuickBooks Fields
Mapping is the heart of a successful import. Each CSV column must align with a QuickBooks field so that the data lands in the correct place. Start by listing the data types you’re importing (customers, vendors, items, invoices, etc.), then identify the corresponding QuickBooks field names and required fields.
- Customer mapping: Name, Company, Bill-To Address, Email, Phone.
- Vendor mapping: Vendor Name, Address, Payment Terms, Email.
- Item mapping: Item Name, Description, Income/Expense account, Price, Taxable flag.
- Transaction mapping: Date, Type (Invoice, Bill, Payment), Amount, Customer or Vendor, Account.
Create a crosswalk worksheet that shows each CSV header, the QuickBooks target field, and whether the field is required. This crosswalk becomes your blueprint for the import and helps catch gaps before you load data into your live file.
If your data includes hierarchical relationships (e.g., customers with jobs or classes), plan how to reflect that structure during the import or in a subsequent enrichment step. Clear mapping minimizes post-import cleanup and improves traceability.
Prepare Your CSV for QuickBooks: Pre-Import Checklist
A careful pre-import checklist helps catch issues before they cascade into the QuickBooks file. Start with a backup of your QuickBooks company file. Then verify data cleanliness, headers alignment, and mapping readiness.
- Back up your company file: This is your safety net if something goes wrong.
- Validate field coverage: Ensure every required QuickBooks field has a corresponding CSV column.
- Clean data: Remove duplicates, standardize formats, and fix typos.
- Create a mapping template: Use a template that links CSV headers to QB fields and marks required fields.
Having a reliable pre-check routine reduces the risk of failed imports and improves the success rate for bulk data loads in your 2026 workflow.
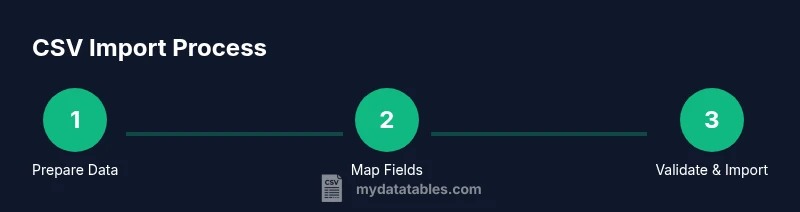
Import Process in QuickBooks Desktop: Step-by-Step (Detailed)
Validate, Reconcile, and Clean Up After Import
Automating Future Imports and Best Practices
Troubleshooting Common Import Issues
Tools & Materials
- QuickBooks Desktop installed and licensed(Ensure you’re using a supported version for CSV or IIF import workflows.)
- CSV file prepared with header row(Headers must map to QuickBooks fields or your template.)
- Backup of QuickBooks company file(Always create a restore point before importing.)
- CSV mapping template(Template links CSV headers to QB fields and marks required columns.)
- Data-cleaning editor (e.g., Excel, Google Sheets)(Used to standardize formats and fix inconsistencies.)
- Sample import file (small subset)(Test with a small subset before full-scale import.)
- Internet connection for QB online resources (optional)(Not required for desktop imports but helpful for access to guides.)
Steps
Estimated time: Total time: 60-120 minutes
- 1
Open QuickBooks Desktop and prepare your data
Launch QuickBooks Desktop and navigate to the appropriate company file. Open your prepared CSV mapping template and ensure the headers align with QuickBooks fields. Confirm you have a recent backup before proceeding so you can recover if something goes wrong.
Tip: Double-check your mapping template against the CSV headers before proceeding. - 2
Choose your import method
Decide whether you will import via the built‑in CSV pathway or use the IIF import method, depending on data type and QB version. If uncertain, start with a small test set to gauge the process. Prepare a rollback plan in case you need to revert.
Tip: If available, prefer the native QuickBooks CSV import path for smoother validation. - 3
Load the CSV file into QuickBooks
In QuickBooks, locate the import option (often under File or Utilities) and select your CSV file. Follow the on-screen mapping prompts to align CSV columns with QuickBooks fields as defined in your template.
Tip: Watch for warnings about missing required fields and resolve them before continuing. - 4
Map fields and confirm data types
Apply the field mappings from your template. Verify that dates, numbers, and text fields are correctly interpreted by QuickBooks. If QuickBooks flags a mismatch, pause the import and correct the CSV before retrying.
Tip: Use a small subset for this step to avoid large-scale errors. - 5
Run a test import with a subset
Import a small portion of records to test the mapping in a live environment. Check resulting QB lists (customers, vendors, items) and basic transactions for accuracy.
Tip: Keep a log of any discrepancies for post-import cleanup. - 6
Validate results and fix issues
Run reports to validate totals, amounts, and dates align with the imported data. If discrepancies appear, identify whether they’re mapping-related or data quality issues in the CSV.
Tip: Document fixes and re-run the import in a controlled manner. - 7
Complete the full import
Proceed with the full data load once the test proves accurate. After import, run a final round of validations and reconcile critical accounts to ensure integrity.
Tip: Schedule a reconciliation window to catch post-import anomalies early. - 8
Document the process for future imports
Create a repeatable workflow with your mapping template, backup plan, and post-import checks. This documentation supports consistent imports for 2026 and beyond.
Tip: Store templates in a shared, version-controlled location.
People Also Ask
Can I import CSV data directly into QuickBooks Desktop?
Yes, QuickBooks Desktop supports CSV imports through a guided import path or by using IIF files, depending on the data type and QB version. Always start with a backup and a small test import to validate the process.
Yes. You can import CSV data using QuickBooks' built-in paths or IIF-based options, but start with a backup and test first.
What data types are commonly importable from CSV?
Common data types include customers, vendors, items, and basic transactions. The exact availability depends on your QuickBooks version and setup, so check the import options for each data type.
Most CSV imports cover customers, vendors, items, and basic transactions, but verify available options for your version.
How should the CSV be formatted for a successful import?
Use a single header row with names that map to QuickBooks fields. Keep data clean, avoid embedded commas without quotes, and save encoded as UTF-8 when possible.
Make sure your CSV has a header row that matches QB fields, clean data, and proper encoding.
What are common import errors and how can I fix them?
Common issues include missing required fields, misformatted dates, and mismatched headers. Fix by updating the CSV, re-checking the mapping template, and retrying with a small test batch.
Typical problems are missing data or wrong headers; fix them in the CSV and try a small test batch first.
Should I always test before a full import?
Yes. Testing minimizes risk, helps validate mappings, and ensures the data shows up correctly before committing to a full import. Always backup first.
Always test with a small subset to confirm mappings and results before a full import.
Watch Video
Main Points
- Prepare data with a clear mapping template
- Back up your company file before any import
- Test on a small subset to validate mappings
- Validate results with reports and reconcile after import
- Document and reuse an import workflow for consistency