How to Import CSV into Quicken
Learn how to import a CSV file into Quicken with a clear, step-by-step method. This guide covers prep, field mapping, error handling, and best practices to keep your finances accurate.

This guide shows you how to import a CSV file into Quicken, including prep, field mapping, and validation. You’ll learn to align your headers with Quicken fields, select the right accounts, and verify results after import. Following these steps helps you migrate data efficiently and minimize reconciliation work.
What import csv into quicken means for your data
For many users, importing a CSV into Quicken is a fast way to migrate transaction history, payees, categories, and accounts without manual entry. The term import csv into quicken refers to mapping each CSV column to a Quicken field so the software can create or update transactions accurately. According to MyDataTables, understanding the data model behind Quicken helps you prepare a file that aligns with its expectations, reducing post-import cleanup and reconciliation tasks. By the end of this section, you’ll see how a well-structured CSV serves as the backbone for a reliable import.
Preparing your CSV: formatting basics
Before you start, ensure your CSV file is clean and consistently formatted. Key formatting rules include using a single header row, avoiding stray punctuation, and keeping dates in a recognizable format. If your file comes from spreadsheets, export with UTF-8 encoding to prevent character issues. A well-structured CSV should have headers like Date, Payee, Category, Memo, Amount, and Account, which makes mapping during import straightforward. When you plan to import csv into quicken, the alignment between headers and Quicken fields is what makes the difference between a smooth import and a frustrating cleanup session. If you anticipate recurring imports, standardize column order and naming to streamline future runs.
Understanding Quicken's import capabilities and limitations
Quicken supports CSV-based imports by design, but there are caveats. Not every CSV layout is compatible out of the box; you may need to rearrange or rename columns to fit Quicken’s expectations. Some fields, like Tax Codes or split transactions, may require special handling or manual adjustments after import. Knowing these limitations helps you plan a robust workflow for import csv into quicken, including how to handle accounts, dates, and payees. This awareness saves time and reduces the risk of duplicates or miscategorized transactions.
Mapping CSV fields to Quicken categories and accounts
Mapping is the heart of a successful import. Create a field map that translates each CSV header to a Quicken field: Date -> Date, Description/Payee -> Payee, Amount -> Amount, Category -> Category, Memo -> Memo, and Account -> Account. If your CSV uses a different naming scheme, consider creating a temporary mapping table. During the import, Quicken will prompt you to confirm or adjust these mappings. A precise map ensures that every row translates into a real transaction rather than a data mismatch.
Cleaning and validating data in your CSV
Data quality is the silent partner to a clean import. Validate dates are consistent, verify that amounts use decimal notation, and check for empty required fields. Remove extraneous characters that could break parsing, such as non-breaking spaces. Run a quick consistency check by sorting by Date and Amount to spot anomalies. When you import csv into quicken, small misalignments become obvious at the validation stage, letting you fix them before they pollute your ledger.
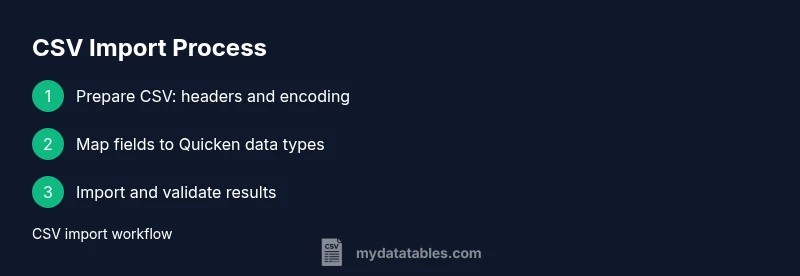
Step-by-step: Import process overview
To import csv into quicken, prepare your file and open Quicken. Start the import wizard, select the CSV file, then map fields to the correct Quicken data types. Choose the target account or create new accounts if needed, and run the import. Finally, review the Imported Transactions list to confirm dates, payees, and categories align with your expectations. If you see mismatches, stop the import and adjust the CSV or mapping before retrying. This iterative check helps ensure accuracy before you reconcile.
Handling common import errors
Common issues include date format mismatches, missing required fields, and mismatched payee names. If Quicken reports an error, review the CSV headers for typos, ensure dates are in a recognized format, and verify that Amount uses a decimal point. Encoding problems can appear as garbled characters; re-save the file as UTF-8 if you see strange symbols. Correcting these issues early prevents a cascade of duplicates and misclassified transactions.
Advanced tips: automating CSV workflows for recurring imports
If you regularly bring data from spreadsheets into Quicken, create a repeatable workflow. Use a consistent header scheme, maintain a mapping template, and save a sample CSV as a reference file. For recurring imports, consider automating the export from your source system and using a fixed import template to reduce manual steps. Automation won’t replace validation, but it greatly lowers procedural friction when import csv into quicken becomes a routine.
Best practices for CSV imports into Quicken
Adopt a disciplined approach to each import session. Always back up your Quicken data before an import, validate at least one test row, and run a post-import reconciliation against your bank statements. Keep a log of field mappings and CSV source details to ensure traceability. Practical CSV import hygiene—such as encoding consistency and delimiter awareness—saves time and preserves data integrity when you import csv into quicken.
Next steps after import and reconcile
After you complete the import, reconcile transactions with your financial statements. Look for any missed payees, miscategorized items, or duplicated entries, and correct them promptly. Use Quicken’s search and filter features to spot anomalies, then re-run a few reports to confirm the ledger’s accuracy. With a clean import, you’ll have a solid foundation for budgeting and long-term financial planning.
Tools & Materials
- Quicken software(Installed and up-to-date for your operating environment)
- Prepared CSV file(Headers must match Quicken fields or map during import)
- Backup of Quicken data(Create before starting the import)
- Text editor(Optional for quick CSV adjustments)
- CSV mapping template(Optional but helpful for recurring imports)
Steps
Estimated time: 30-60 minutes
- 1
Open Quicken and start the CSV import
Launch Quicken, navigate to the Import function, and select your prepared CSV file. This first action sets the stage for field mapping and destination selection.
Tip: Have your mapping template ready to speed up the next step. - 2
Map CSV columns to Quicken fields
During import, align Date, Payee, Amount, Category, and Account to the corresponding Quicken fields. If a header doesn’t fit, create a temporary alias or adjust the CSV headers.
Tip: Check for exact header spelling to avoid mapping errors. - 3
Choose destination accounts
Select the target accounts in Quicken where the transactions will live. If needed, create new accounts to reflect real-world structures.
Tip: Keep a consistent account naming convention for future imports. - 4
Run the import and monitor progress
Execute the import and watch for immediate errors. If a problem appears, stop, fix the CSV or mapping, and retry with a smaller batch.
Tip: Perform a quick sanity check on a few rows first. - 5
Review and validate results
After import, inspect the Transactions List for dates, payees, and categories. Look for duplicates and misclassifications and correct them.
Tip: Sort by Date and Amount to spot outliers quickly. - 6
Resolve issues and reconcile
Address any discrepancies by editing transactions or tweaking mappings, then reconcile with your bank statements.
Tip: Keep a changelog of fixes for traceability. - 7
Save a reusable template
If you’ll import similar data again, save your mapping as a template to speed up future imports.
Tip: Templates reduce human error on repetitive tasks. - 8
Document the workflow
Record the source, date format, delimiter, and account structure for audits and onboarding new users.
Tip: Having a documented process saves time and confusion later.
People Also Ask
Can I import CSV files with multiple accounts into Quicken?
Yes, you can import multiple accounts if your CSV includes an Account column and you map it correctly during the import. Some versions may require post-import adjustments for multi-account transactions.
You can import multiple accounts if the CSV has an Account column and you map it properly. You may need to adjust after import.
What if my CSV uses a semicolon instead of a comma?
Quicken expects comma-delimited CSV by default. Convert the file to comma-delimited CSV before import, or adjust the delimiter in your export settings from the source system.
If your file uses semicolons, convert it to comma-delimited CSV before importing.
How do I map fields to Quicken during import?
During the import wizard, you will see a field-mapping step. Align headers like Date, Payee, Amount, Category, and Account to Quicken fields. If a column is missing, you can add it or adjust your CSV.
Use the mapping step in the import wizard to align each CSV column with the Quicken field.
Can I import attachments or images with CSV data?
CSV imports in Quicken typically handle transaction data only. Attachments require separate handling, usually outside the import function.
Attachments are not generally imported via CSV; you’ll need separate methods.
What should I do if I see duplicates after import?
If duplicates appear, double-check the date and amount fields, verify that the payee names are consistent, and consider enabling a post-import de-duplication step or adjusting your mapping for future imports.
Check dates and payees, then clean duplicates manually or with a deduplication pass.
Is automation possible for CSV imports in Quicken?
Automation depends on your Quicken version and external tools. You can automate export of source data and reuse a fixed import template for consistency, but validation remains essential.
You can automate parts of the workflow, but you should still validate each import.
Watch Video
Main Points
- Prepare a clean CSV with aligned headers
- Map fields accurately to Quicken data types
- Validate results before reconciliation
- Back up data prior to import
- Document your import workflow