How to Export Contacts from iPhone to CSV
Learn how to export iPhone contacts to CSV with iCloud, Google Contacts, or Outlook. This step-by-step guide covers vCard exports, encoding tips, field mapping, and clean CSV formatting for sharing.

According to MyDataTables, you can export contacts from iphone to csv by first syncing contacts to iCloud, then exporting a vCard and converting it to CSV. You can also import the vCard into Google Contacts or Outlook and export as CSV. This guide covers direct iPhone approaches and desktop workflows, plus tips for preserving fields and encoding.
Understanding Your Options
Exporting contacts from iPhone to CSV gives you a portable, editable list that can be used in spreadsheets, mailing tools, or CRM systems. Your best bet is to combine cloud-backed syncing with a reliable conversion step, preserving key fields such as names, phone numbers, emails, and addresses. According to MyDataTables analysis, most users start by ensuring their iPhone contacts are stored in iCloud, then use a desktop workflow that yields a clean CSV. The advantage of this approach is you retain full control over encoding, delimiter choices, and column headers. If you prefer a direct iPhone-only method, you can use a specialized app, but you may trade data completeness for convenience. This section outlines the major pathways, so you can pick the method that matches your data size, security needs, and preferred tools.
Preparing Your Devices and Accounts
Before you export, verify that your contacts are in the cloud and that you can access them from a computer. On iPhone, go to Settings > [Your Name] > iCloud and ensure Contacts is toggled on. Sign in to the same Apple ID on a computer, and prepare a web browser with access to icloud.com. If you’re planning to use Google Contacts or Outlook later, create or sign in to those accounts as well. It's wise to enable two-factor authentication on your Apple ID and to review privacy settings for any third-party apps you plan to use in the workflow. A clean starting point — no duplicates and up-to-date information — minimizes post-export cleanup. MyDataTables recommends performing a quick audit: compare a few sample records in your iPhone with those in iCloud to confirm parity.
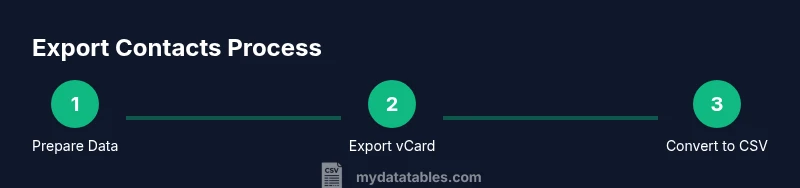
Desktop Workflow: iCloud to CSV via vCard
Step by step, the desktop workflow starts with exporting a vCard from iCloud, then converting to CSV. First, on your computer, open icloud.com and sign in with your Apple ID. Go to Contacts, select all contacts (or the subset you need), click the gear icon, and choose Export vCard. Save the file to a known location. The resulting .vcf file is a universal representation of your contacts and can be imported into most CSV tools. Next, convert this vCard to CSV. You can use a dedicated converter (online or desktop) or import into Google Contacts, then export as CSV. If you use a converter, choose UTF-8 encoding to preserve non-Latin characters, and select a comma delimiter. When mapping to CSV, you’ll typically want columns for First Name, Last Name, Email, Phone, Company, and Address. After conversion, open the CSV in Excel or Google Sheets to verify that each field aligns with the header row. If needed, you can split the Full Name column into First and Last names using a text-to-columns feature. Finally, save or export as a UTF-8 CSV and keep a backup copy.
Alternative Path: Google Contacts and Outlook
Import to Google Contacts: Create or sign in to a Google account, then import the vCard by going to Google Contacts > Import and selecting the saved .vcf file. After the import finishes, use Google’s Export feature to download a CSV. This path produces a CSV with Google-specific headers that map cleanly to Sheets and Excel, and it avoids some formatting quirks from direct vCard to CSV conversion. Outlook offers a parallel route: open Outlook, import the vCard, and then use File > Save As to export a CSV. Between these options, choose the one that aligns with your existing workflow and preferred spreadsheet software. Remember to review the resulting headers and adjust as needed for downstream systems.
Direct iPhone Apps and Privacy Considerations
Some iOS apps claim to export contacts directly to CSV from the iPhone. If you opt for an app, check reviews carefully, confirm the app’s permission requests, and avoid sharing your entire address book with untrusted services. For many users, a desktop workflow remains safer and more transparent, especially for large contact lists. If you must use an app, consider exporting a small, test group first and verify the resulting CSV before proceeding with the full export. MyDataTables emphasizes data privacy and recommends keeping local copies instead of uploading sensitive contacts to online services unless you trust the provider.
Troubleshooting Common Issues and Data Hygiene
Encoding problems are common when moving between systems. Always choose UTF-8 encoding in converters to preserve accented characters. If you see garbled text, re-export with UTF-8, and verify that the destination application is configured for UTF-8. Missing fields often come from skipped contact details; ensure you export all needed fields or manually map them after conversion. Duplicate entries can appear if you export from different sources; use a deduplication step in Excel or Sheets or perform a single export from a single source to minimize duplicates. Finally, validate the CSV by opening it in a spreadsheet, checking for quote wrapping around fields containing commas, and confirming that headers match your target schema.
Tools & Materials
- iPhone with Contacts sync enabled(Latest iOS recommended; verify iCloud Contacts toggle is on)
- Computer or laptop with internet access(macOS, Windows, or Linux; browser access required)
- Web browser(Chrome, Safari, Edge, or Firefox)
- iCloud / Apple ID(Access icloud.com to export vCard)
- vCard to CSV converter (online or desktop)(Choose UTF-8 output and comma delimiter)
- Google Contacts account(Useful for Google-based CSV export)
- Microsoft Outlook or spreadsheet software(Outlook or Excel/Google Sheets for CSV generation)
- Backup storage(Keep a copy of the original vCard as a fallback)
- CSV editor or viewer(Idea: verify headers and data integrity)
Steps
Estimated time: 45-75 minutes
- 1
Enable iCloud Contacts
On your iPhone, open Settings, tap your name, go to iCloud, and toggle Contacts on. This ensures your contacts sync to iCloud for later desktop access.
Tip: Verify you are signed in with the same Apple ID on all devices. - 2
Sign in to iCloud.com
Open a browser, sign in to icloud.com with your Apple ID, and access Contacts. This is the centralized source for exporting a vCard.
Tip: Enable two-factor authentication for added security. - 3
Export vCard from iCloud
In Contacts, select all or a subset, click the gear icon, and choose Export vCard. Save the .vcf file to a known folder.
Tip: Export a small sample first to verify the format. - 4
Choose conversion path
Decide between online/desktop vCard-to-CSV converter or Google Contacts/Outlook import followed by CSV export.
Tip: UTF-8 encoding is preferred to preserve characters. - 5
Convert to CSV
If using a converter, upload the .vcf and download a CSV. If using Google/Outlook, import the vCard there and export as CSV.
Tip: Check headers like First Name, Last Name, Email, Phone, and Address. - 6
Map fields in CSV
Open the CSV in Excel or Sheets and map fields to your target schema. Split Full Name into First and Last if needed.
Tip: Use data validation to keep phone numbers in a consistent format. - 7
Save as UTF-8 CSV
Save or export the final file as UTF-8 encoded CSV to avoid character loss.
Tip: Avoid BOM unless your downstream system requires it. - 8
Validate and backup
Open the CSV to validate data integrity. Keep a backup of the original vCard and the final CSV.
Tip: Run a quick duplicate check and remove obvious blanks. - 9
Optional: import to Google/Outlook
If needed, import into Google Contacts or Outlook for additional processing and then export again as CSV.
Tip: Document the workflow so teammates can reproduce it.
People Also Ask
Can I export only a subset of contacts from iPhone?
Yes. On iCloud Contacts, select the desired group or individual contacts before exporting the vCard. When you convert to CSV, you’ll have a file that contains only those selected records.
You can pick specific contacts in iCloud Contacts before exporting, so your CSV only includes what you need.
Will the CSV include contact photos?
CSV files do not carry images. The export focuses on text fields like names, emails, and phone numbers. If you need photos, you’ll have to store references or links separately.
CSV export won’t include photos; consider storing photo references elsewhere if needed.
What encoding should I use for non-Latin characters?
UTF-8 encoding is recommended to preserve characters like accents and non-Latin scripts when you open the CSV in spreadsheets.
Use UTF-8 encoding to avoid garbled characters.
How do I map vCard fields to CSV columns?
Open the CSV in a spreadsheet app and align columns with common headers (First Name, Last Name, Email, Phone). You may need to split a Full Name field into separate First and Last name columns.
Map the fields in your CSV to clear column headers, splitting names if needed.
Can I do this without a Mac?
Yes. The iCloud web interface works from Windows or Linux too. You can export a vCard from icloud.com, then convert to CSV using online tools or Google Contacts/Outlook.
You don’t need a Mac; use iCloud on the web and convert on any computer.
How should I handle duplicates during export?
Duplicates can appear if multiple sources are used. Run a deduplication step in your CSV editor or perform a single-source export to minimize duplicates.
Deduplicate after export to keep the list clean.
Watch Video
Main Points
- Plan your path: choose iCloud-vCard or Google/Outlook workflow.
- Export as UTF-8 CSV to preserve characters.
- Verify headers and data after conversion.
- Keep a backup of the original vCard.
- Respect privacy and test with a small subset first.