Import CSV in MySQL Workbench: A Practical Guide
Learn how to import csv in mysql workbench with a clear, practical approach. Prepare your CSV, configure the Table Data Import Wizard, map columns, handle errors, and verify results for reliable loading.

According to MyDataTables, you can import csv in mysql workbench by using the Table Data Import Wizard in MySQL Workbench. This quick path handles CSV formatting, delimiter choices, and data type mapping. The steps in this guide make the process reliable for analysts and developers. It also highlights common pitfalls and how to verify results.
Prerequisites and setup
Before importing, ensure MySQL Workbench is installed and you can connect to your MySQL server. You should have a target schema ready, and rights to create or modify tables. Use UTF-8 encoding for CSV files to avoid character loss, and confirm the delimiter matches your data (often comma). If your CSV contains a Byte Order Mark (BOM), save without BOM or remove it, as BOM can cause the first column to appear with stray characters. Finally, back up your database or test on a staging environment to prevent accidental data loss. If you plan to import csv in mysql workbench, ensure the environment is prepared for a smooth load.
Understanding import methods in MySQL Workbench
MySQL Workbench offers a GUI-based import wizard that guides you through loading a CSV into a table. For automation or scripting, you can use SQL like LOAD DATA INFILE, but the wizard is ideal for quick imports without writing SQL. The wizard can create a new table or populate an existing one, and it walks you through file selection, delimiter choice, and column mapping. This balance of simplicity and control makes it the preferred path for most users.
When you need repeatable, scripted loads, plan a small automation that mirrors the wizard steps and uses stored procedures or SQL scripts. The wizard is the best starting point for most datasets, especially when you are learning the process.
CSV formatting basics for MySQL import
Start with a clean CSV that has a header row matching the destination columns or a dataset where you can map headers to columns. Use a consistent delimiter such as a comma; regional settings may require semicolons or tabs. Enclose text with quotes if it contains the delimiter or line breaks. Save the file as UTF-8 without BOM to minimize character issues and ensure that dates and numbers align with MySQL types before import.
If your data includes special characters or non-Latin scripts, UTF-8 encoding is especially important to preserve data integrity during import.
Preparing the CSV file for your database
Inspect a small sample of rows to verify formatting and data types. Remove any extraneous columns that do not exist in the target table to avoid mapping errors. Normalize date formats, preferably using ISO-8601 (YYYY-MM-DD) for date fields, and ensure decimal separators align with locale expectations. Create a backup of both the CSV and the destination table so you can revert if needed.
Test a subset of data first to catch issues early before loading the full file. This practice reduces debugging time and helps you verify that the mapping will work as expected.
Step-by-step: Using the Table Data Import Wizard
Open MySQL Workbench and connect to your server. Right-click the target database or table and select the Table Data Import Wizard. Choose your CSV file, then configure the import options such as delimiter, encoding, and quote character. Map each CSV column to a destination table column, adjust data types if the wizard suggests, and review constraints. Finally, run the import and observe the progress bar until completion. If the wizard reports errors, review the error log and correct CSV formatting or mapping accordingly.
tip":"Use the Preview option in the wizard to verify how rows map before you commit the import."
Mapping columns, data types, and constraints
The key to a clean import is correct mapping of CSV columns to table columns. Ensure column order aligns with the table, and review MySQL data types for compatibility (for example, DATETIME vs DATE, DECIMAL precision). If a column in CSV corresponds to a NOT NULL field, you must provide a value or allow the wizard to fill with a default. Use the wizard to adjust types if needed and confirm that default values won’t compromise data integrity.
tip":"Double-check numeric and date fields for proper formatting before finalizing the import."
Handling common import errors and how to fix them
Column count mismatches, NOT NULL violations, and invalid date formats are common issues during CSV imports. If you encounter a mismatch, re-check the CSV header against the destination table and re-map columns as needed. For NOT NULL constraints, ensure every row provides a value or define a default in the table. Use a test subset to reproduce errors in a controlled way.
If you see encoding problems, re-save the CSV as UTF-8 and avoid BOM. Large files can trigger timeouts; consider splitting the file or increasing timeout limits. Always review the Workbench error log for precise guidance.
tip":"Keep a small, representative sample of the data for faster debugging."
Post-import checks and best practices
After import, run counts and spot checks to compare source vs. destination. Use simple SELECT queries to validate sample rows and verify data types. Create or rebuild indexes to optimize queries on imported data and run ANALYZE TABLE to update statistics. Document the import steps and store a copy of the used CSV and a log of any mapping decisions for future audits.
tip":"Document the import process in your data pipeline so it can be repeated consistently."
Advanced tips: automation and large files
For large datasets, split the CSV into chunks and import sequentially to avoid timeouts. If you need repeatable loads, automate the process using a script that calls the same mapping logic as the wizard and uses LOAD DATA INFILE where appropriate. Ensure server-side file access permissions and secure handling of credentials. Consider staging the data first and then merging into production tables to minimize downtime.
tip":"Automation helps ensure reproducibility and reduces manual errors over time."
Tools & Materials
- MySQL Workbench(Installed on your computer and updated to a recent version)
- CSV file(UTF-8 encoding recommended; header row must align with destination columns)
- Database connection credentials(Host, port, user, password, and target schema/database access)
- Target table or empty schema(Create the destination table or ensure it exists for import)
- Delimiter specification(Standard comma is typical; be explicit if using semicolon or tab)
- Testing data (optional)(A small sample to validate the mapping and types)
Steps
Estimated time: 30-45 minutes
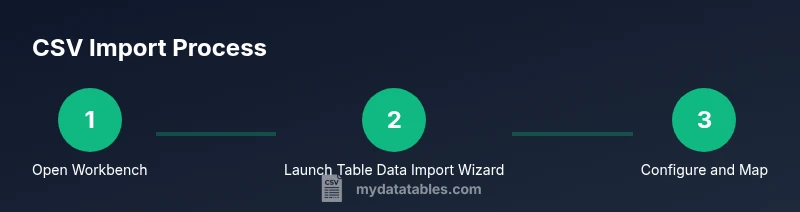
- 1
Open Workbench and connect to your server
Launch MySQL Workbench and establish a connection to the server hosting the target database. Verify you have the necessary privileges to read from the CSV source and write to the destination table.
Tip: If you cannot connect, check network access and user permissions before proceeding. - 2
Select the destination database and prepare the table
In the SCHEMAS panel, select the target database. Ensure the destination table exists or plan to create a new one during the wizard. Having the table structure ready minimizes mapping issues later.
Tip: If creating a new table, define column names and types that match the CSV data. - 3
Launch the Table Data Import Wizard
Right-click the target database or table and choose Table Data Import Wizard. This opens the guided interface for CSV import.
Tip: If the wizard isn’t visible, you may need to enable the feature or access it via a menu path in your Workbench version. - 4
Configure file and import options
Select your CSV file and set the delimiter, encoding, and quote characters. Confirm whether the first row is a header and adjust settings accordingly.
Tip: Use UTF-8 without BOM to prevent leading character issues. - 5
Map CSV columns to table columns
Align each CSV column with the corresponding destination column. Adjust data types if the wizard suggests alternatives to prevent conversion errors.
Tip: Keep a one-to-one mapping for clarity and easier verification. - 6
Review constraints and defaults
Check NOT NULL constraints, default values, and any required constraints. Add or adjust defaults to avoid import failures.
Tip: If needed, temporarily relax constraints during the load and re-enable them afterward. - 7
Run the import and monitor progress
Execute the import and watch the progress indicator. If errors occur, stop, fix the CSV or mapping, and retry with a smaller subset.
Tip: Use a small batch first to validate before loading all data. - 8
Validate results and finish
Run quick checks (row counts, spot checks on sample rows) to confirm the load succeeded. Document the process and back up the updated table.
Tip: Keep a log of the import session for reproducibility.
People Also Ask
What is the Table Data Import Wizard in MySQL Workbench?
The Table Data Import Wizard is a GUI tool in MySQL Workbench that guides you through importing CSV data into a table. It helps with file selection, delimiter choice, and column mapping, and can create a new table or populate an existing one.
The Table Data Import Wizard is a GUI tool that guides you through importing CSV data into a table, including file selection and column mapping.
Can I import a CSV with a delimiter other than a comma?
Yes. The wizard lets you specify the delimiter used in your CSV, such as semicolon or tab, ensuring the data is parsed correctly during import.
Yes, you can specify the delimiter in the wizard to match your CSV.
What should I do if I get a column count mismatch during import?
Check that the number of CSV columns matches the destination table columns and that all columns are properly mapped. Adjust the CSV or destination table as needed and retry.
If you see a column count mismatch, re-check the mapping and adjust either the CSV or the table structure.
Do I need to create the destination table before importing?
You can either create a new table during the wizard or select an existing one. Ensure the target columns align with the CSV headers to avoid mapping errors.
You can create the table during the import or use an existing one, as long as the columns line up with your CSV.
How can I handle non-ASCII characters in CSV?
Use UTF-8 encoding for the CSV and ensure the database connection uses the same character set. If issues persist, convert the file encoding before import.
Use UTF-8 encoding and ensure the connection uses UTF-8 as well.
Is there a size limit for CSV imports in Workbench?
Workbench does not publish a fixed size limit; performance depends on your machine, server configuration, and the size of the data. For very large files, consider chunking or alternative methods.
There isn’t a fixed limit; try splitting large files if you run into performance issues.
Watch Video
Main Points
- Prepare CSV with a clean header and consistent delimiters
- Use the Table Data Import Wizard for reliability
- Map columns and data types carefully to avoid type errors
- Validate results with spot checks and counts after import
- Document the process for repeatability and audits